How to Connect a Custom Domain to Your Arc CMS Site
By default, your Arc CMS site is available at a Firebase URL like your-project.web.app. This guide walks you through connecting your own domain name (like yourproduct.com), so visitors see your brand instead of a Firebase address.
The process takes about 10 minutes of active work, but DNS changes can take up to 48 hours to fully take effect.
Before You Start
You will need:
A domain name you already own (purchased from any registrar like GoDaddy, Namecheap, Hostinger, Google Domains, etc.)
Access to your domain registrar's DNS settings
Access to the Firebase Console for your project
If you don't own a domain yet, you can purchase one from any domain registrar. GoDaddy, Namecheap, and Hostinger are popular choices for affordable domains.
Step 1: Open Firebase Hosting Settings
Go to the Firebase Console: https://console.firebase.google.com/
Select your project
In the left menu, click "Hosting" under the Build section
You will see your current
.web.appdomain listedClick "Add custom domain"
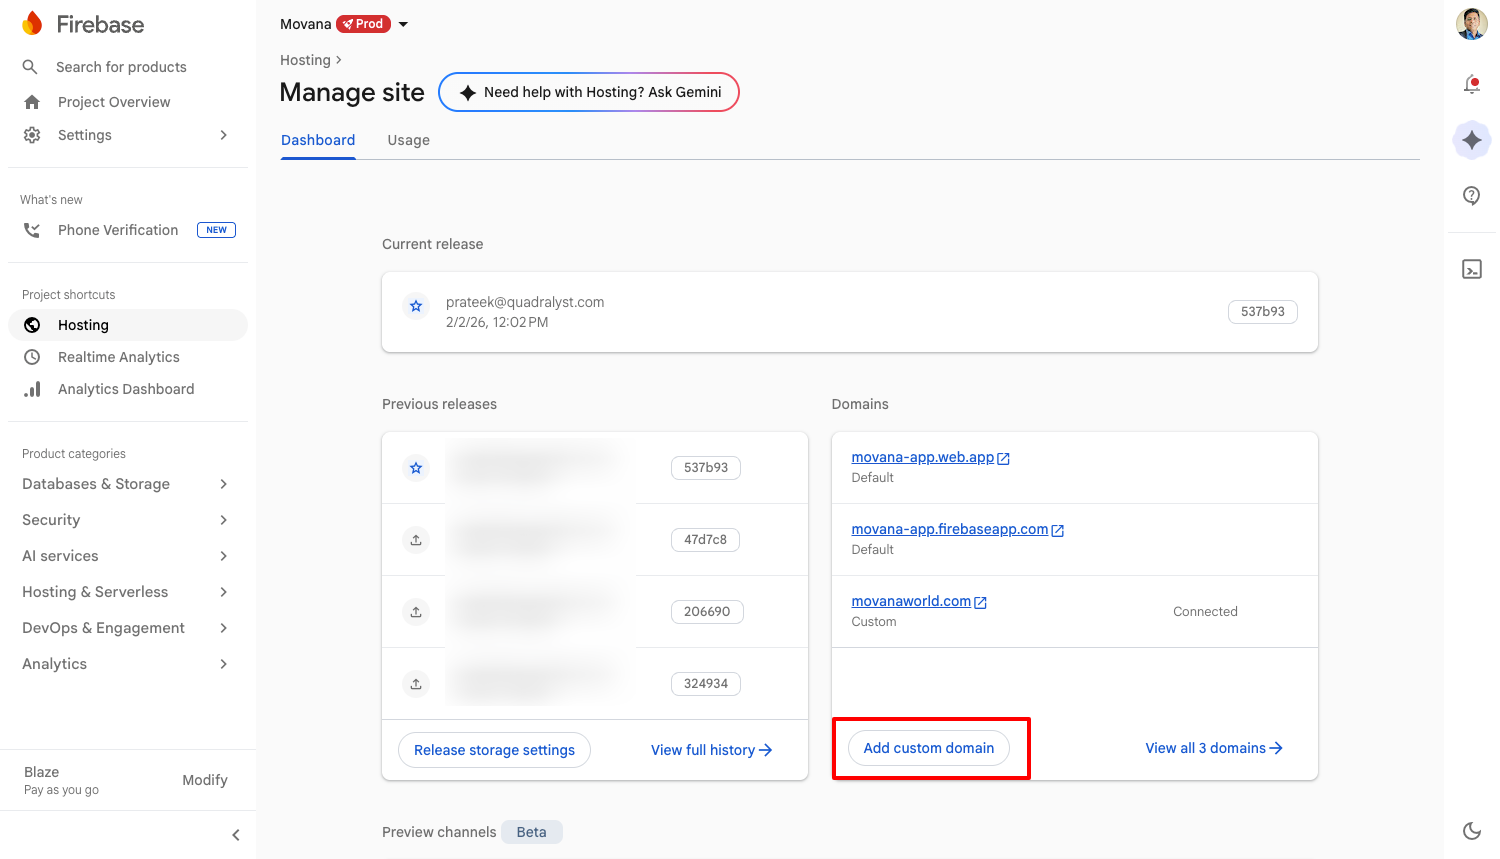
[Screenshot: Firebase Hosting page with "Add custom domain" button highlighted]
Step 2: Enter Your Domain Name
Firebase will ask you to enter the domain you want to connect.
For a root domain (e.g., yourproduct.com): Type your domain without www.
For a subdomain (e.g., www.yourproduct.com or app.yourproduct.com): Type the full subdomain.
If you want both yourproduct.com and www.yourproduct.com to work, you will need to add them separately. Start with the root domain first, then repeat the process for the www version.
Click "Continue".
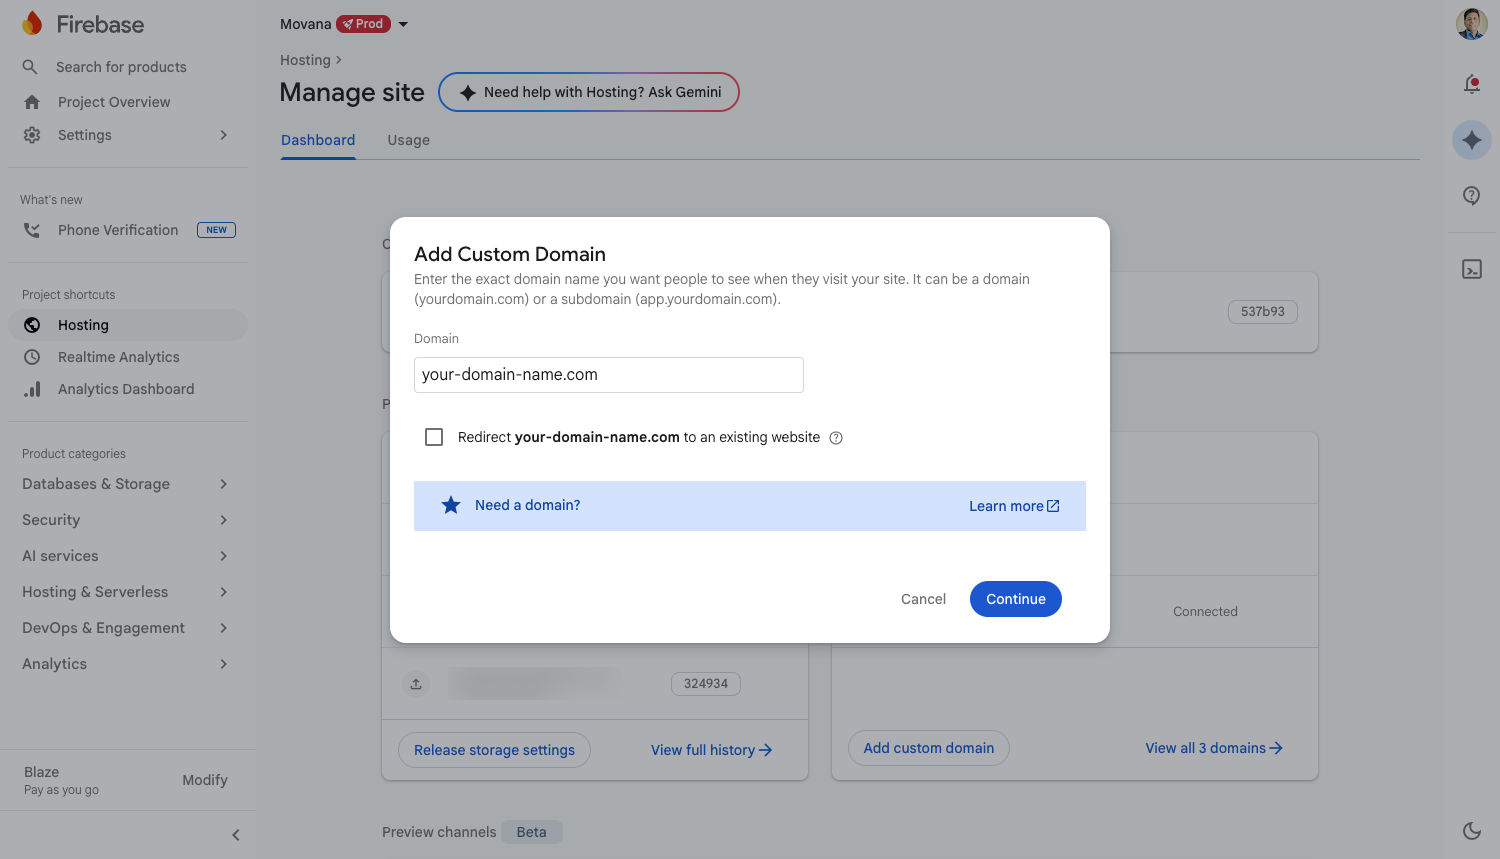
[Screenshot: Add custom domain dialog with domain entered]
Step 3: Verify Domain Ownership
Firebase needs to confirm that you own this domain. It will give you a TXT record to add to your DNS settings.
You will see something like:
Host/Name:
@(or your domain name, depending on the registrar)Type: TXT
Value: A long string starting with
firebase=...
Now open your domain registrar's website in a new tab and find the DNS settings for your domain. This is usually under "DNS Management", "DNS Settings", or "Advanced DNS".
Add the TXT record exactly as Firebase shows it.
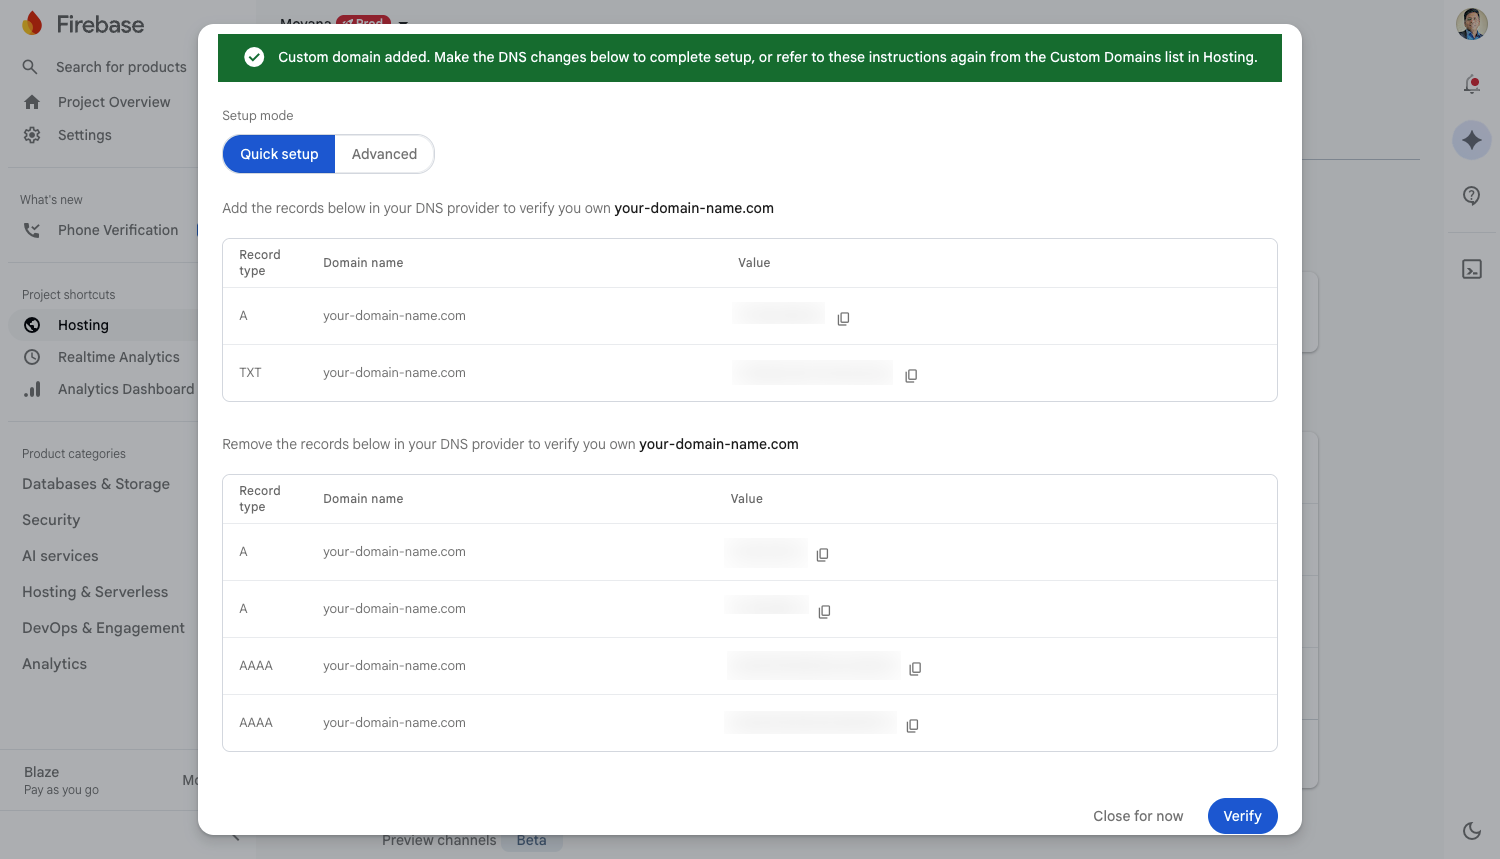
[Screenshot: Firebase verification screen showing TXT record details]
Where to find DNS settings in popular registrars
Namecheap: Dashboard > Domain List > Manage > Advanced DNS
GoDaddy: My Products > Domain > DNS > DNS Records
Hostinger: Domains > Manage > DNS / Nameservers
Google Domains: My domains > DNS
Once you have added the TXT record, go back to Firebase and click "Verify".
Note: Verification can be instant or take a few minutes. If it doesn't verify right away, wait 5-10 minutes and try again.
Step 4: Add DNS Records to Point Your Domain to Firebase
After verification, Firebase will give you DNS records to route traffic from your domain to your site. The records you need depend on whether you are connecting a root domain or a subdomain.
For a root domain (yourproduct.com)
Firebase will provide two A records:
Type: A
Host/Name:
@Value:
151.101.1.195or whatever is provided by Firebase (first record)Value:
151.101.65.195or whatever is provided by Firebase (second record)
Add both A records in your registrar's DNS settings.
For a subdomain (www.yourproduct.com or app.yourproduct.com)
Firebase will provide a CNAME record:
Type: CNAME
Host/Name:
www(or whatever your subdomain is)Value:
your-project.web.app
Add this CNAME record in your registrar's DNS settings.
Setting up both root and www
If you want both yourproduct.com and www.yourproduct.com to work, add the A records for the root domain and the CNAME record for the www subdomain. Firebase will handle redirecting one to the other automatically.
Step 5: Wait for DNS Propagation
After adding the DNS records, Firebase will show your domain as "Pending" or "Needs setup". This is normal.
DNS changes take time to spread across the internet. Here is what to expect:
Best case: 15-30 minutes
Typical: 1-2 hours
Worst case: Up to 48 hours
You don't need to do anything during this time. Firebase will automatically detect when the DNS records are active and provision a free SSL certificate for your domain. Once complete, the status will change to "Connected".
Step 6: Update Your Site URL in Arc CMS
Now that your custom domain is connected, update the Site URL inside Arc CMS so that emails, SEO links, and page headers use your new domain instead of the .web.app address.
Go to your Arc CMS admin dashboard
Navigate to Settings
Find the "Site URL" field
Change it from
https://your-project.web.apptohttps://yourproduct.comSave the changes

[Screenshot: Arc CMS Settings page with Site URL field highlighted]
Troubleshooting
Domain stuck on "Pending" for more than 48 hours? Double-check that the DNS records in your registrar match exactly what Firebase provided. Some registrars add your domain name automatically to the host field, which can cause duplicates like yourproduct.com.yourproduct.com. The host field should just be @ for root domains.
Site shows a security warning? The SSL certificate is still being provisioned. This usually resolves within an hour after DNS propagation completes.
Old site showing instead of Arc CMS? Your browser might be caching the old DNS records. Try opening the site in an incognito window or clearing your browser cache.
Need Help?
If you get stuck at any point, contact us at hi@quadralyst.com. We are happy to help you connect your domain.