How to Set Up Firebase for Arc CMS
Arc CMS runs on your own Firebase server. This means you own your data, your code, and your hosting. No one can take it away from you.
This guide walks you through creating a Firebase project and giving us access so we can set up Arc CMS for you. The whole process takes about 10 minutes.
Step 1: Go to Firebase Console
Open the Firebase Console in your browser and sign in with your Google account.
Link: https://console.firebase.google.com
If you don't have a Google account, you will need to create one first.
Step 2: Create a New Project
On the welcome screen, click "Create a new Firebase project".
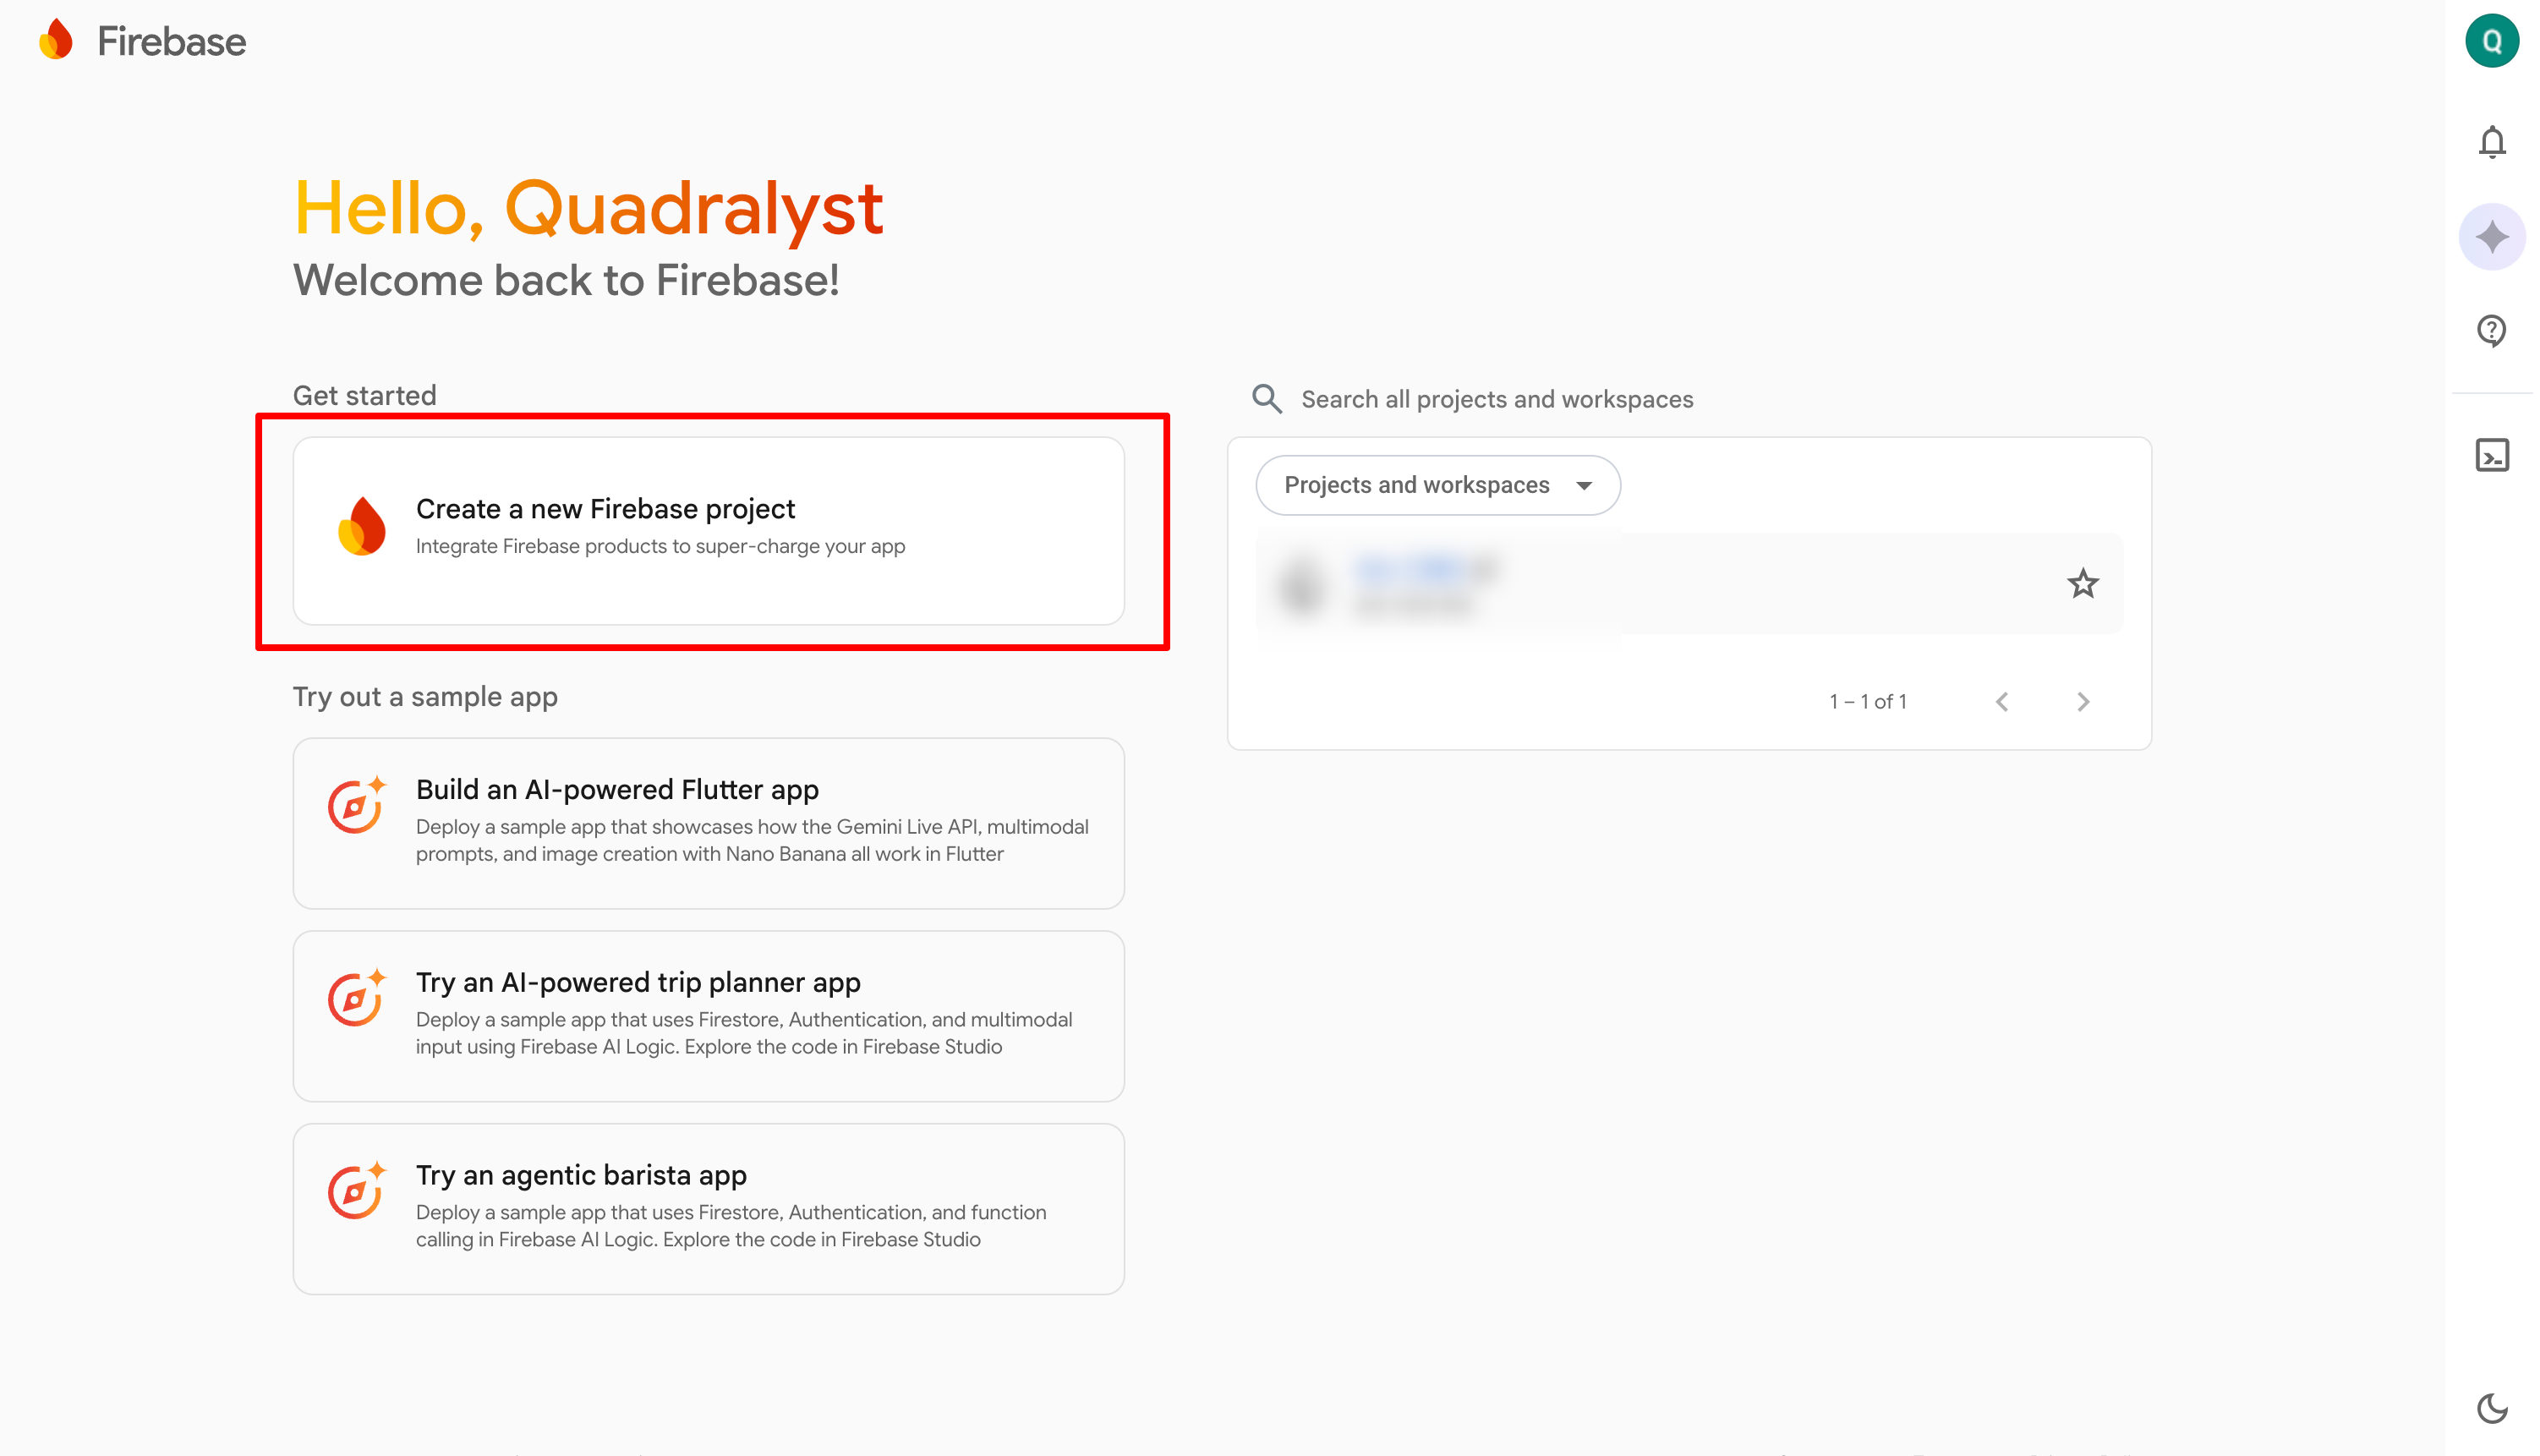
[Screenshot: Create project button highlighted]
Step 3: Name Your Project
Enter a name for your project. This can be your product name or company name.
Type your project name
Accept the Firebase terms
Click "Continue"
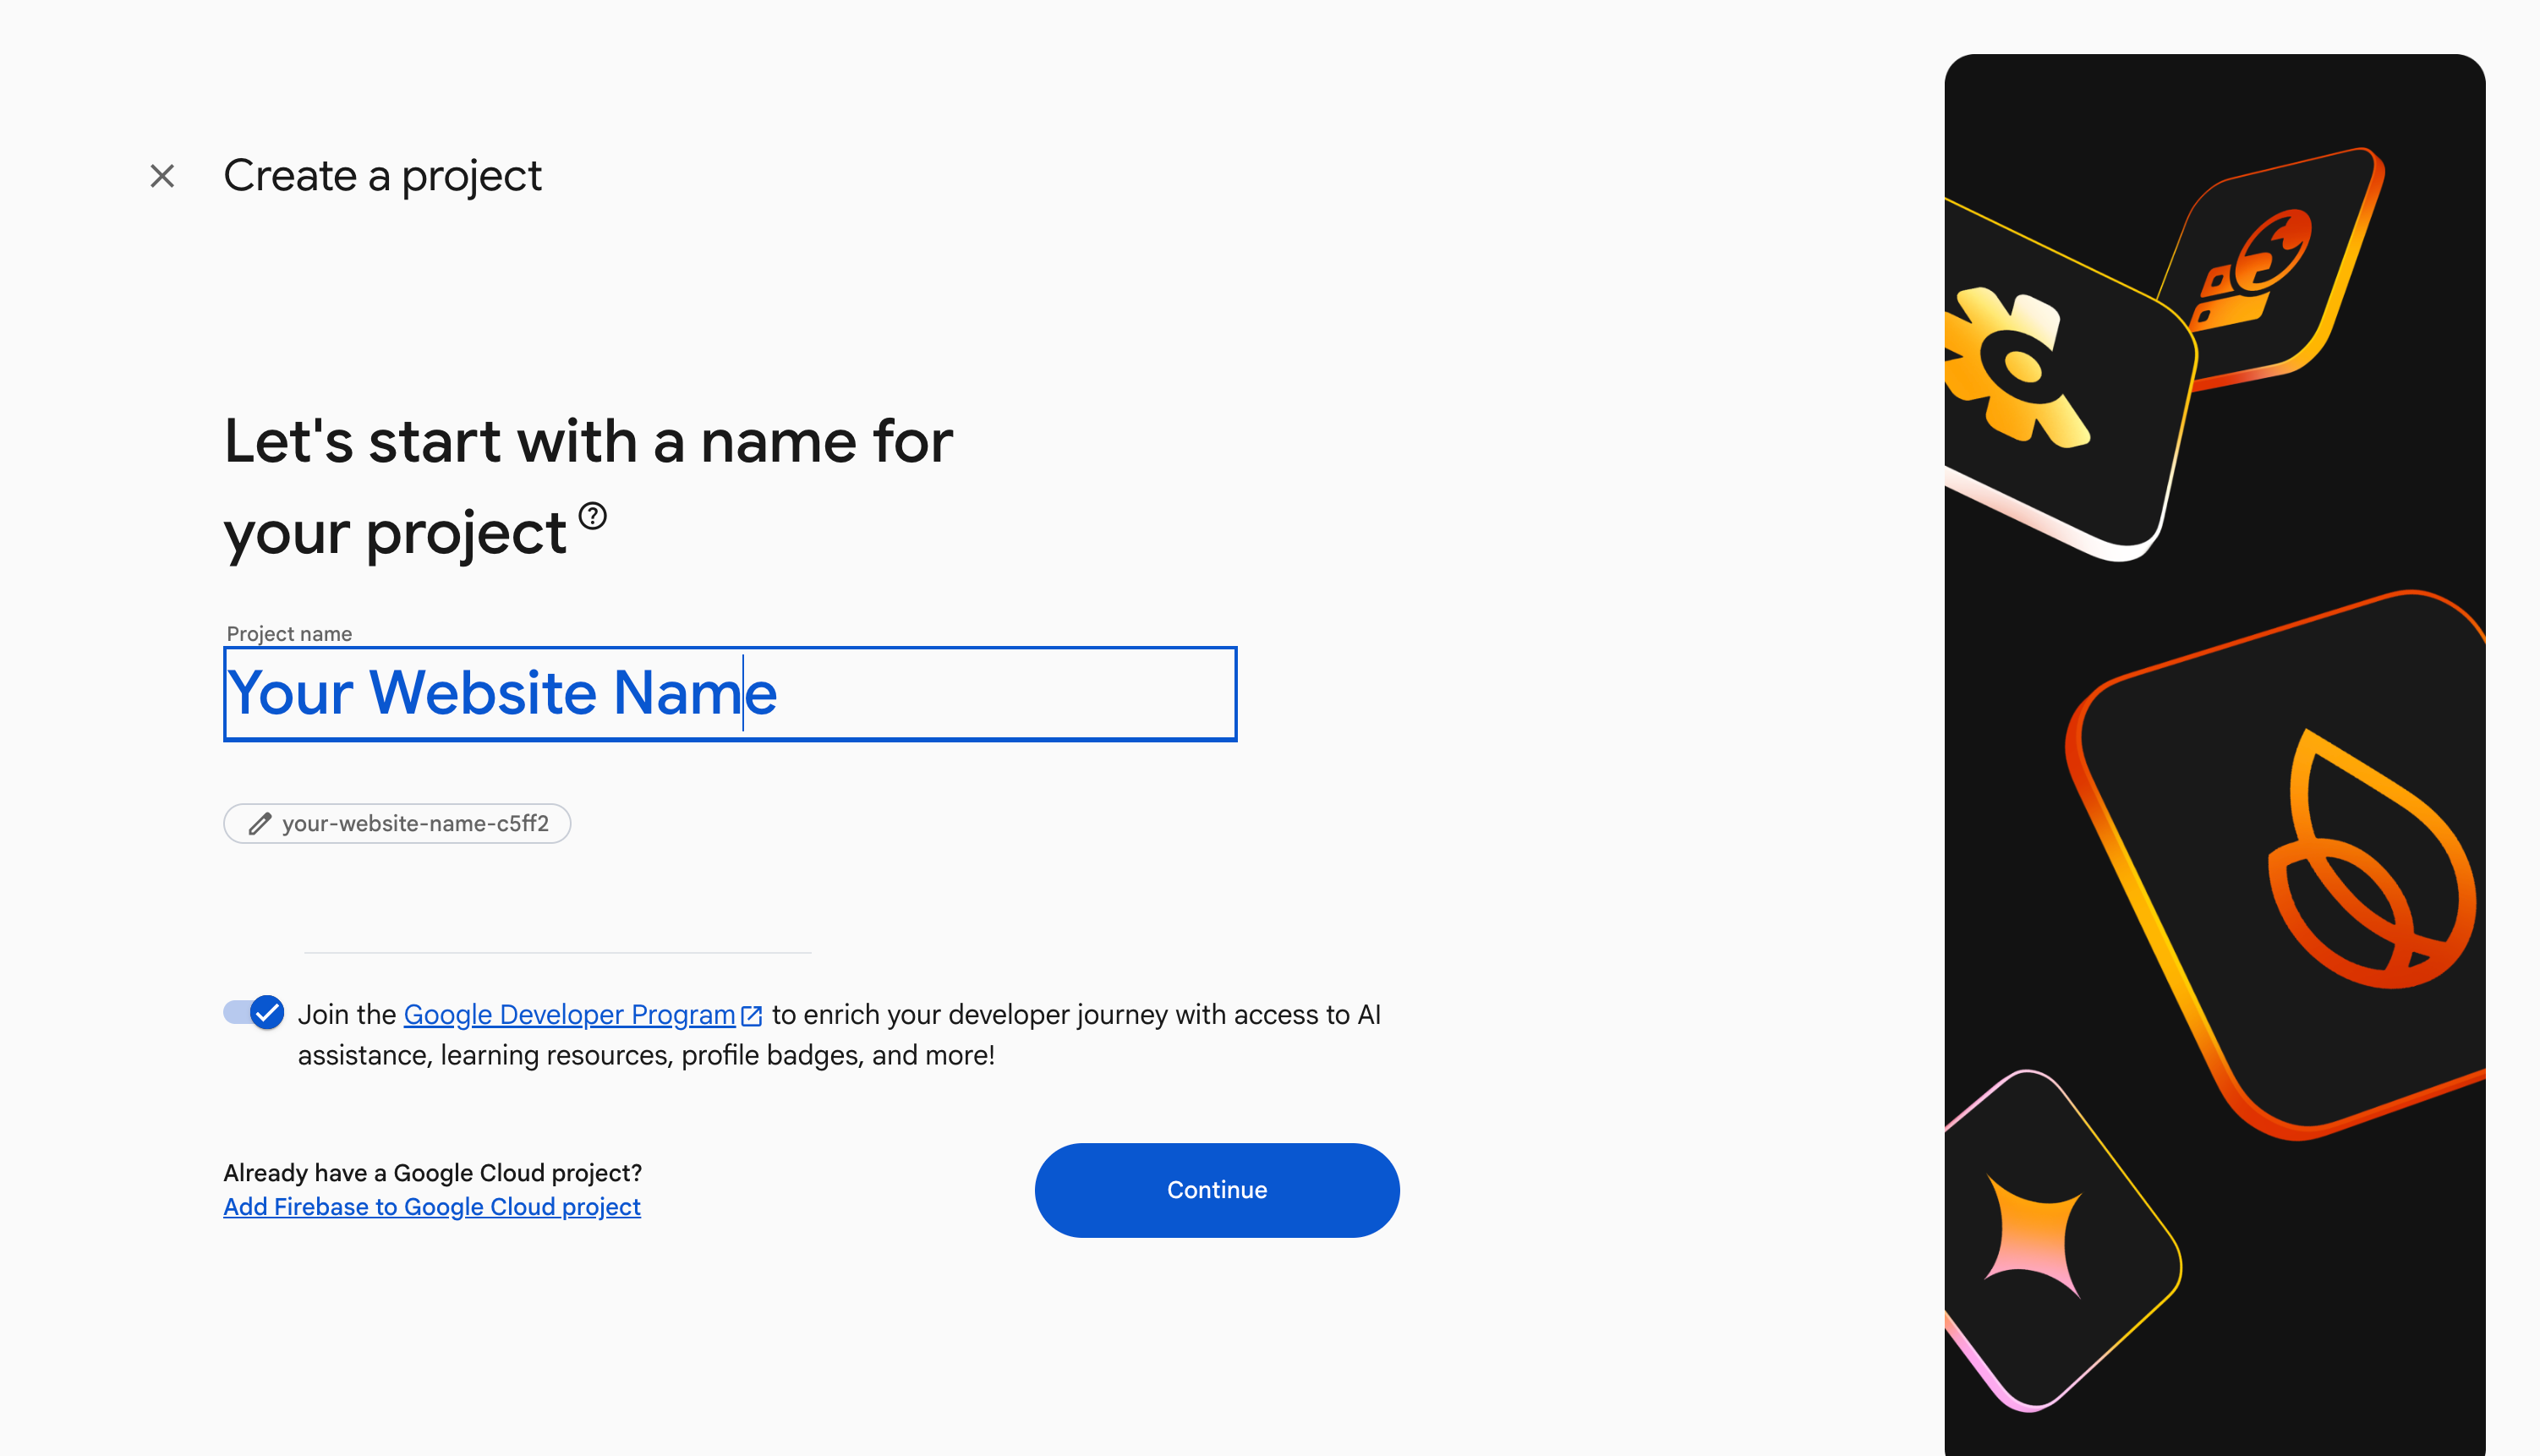
[Screenshot: Project naming screen]
Step 4: Enable Google Analytics
The next screen asks about Google Analytics. Keep it enabled. Arc CMS uses this to show you visitor and signup stats in your dashboard.
Leave the toggle on
Click "Continue"
On the next screen, select "Default Account for Firebase"
Click "Create project"
Firebase will take a minute or two to set up your project.
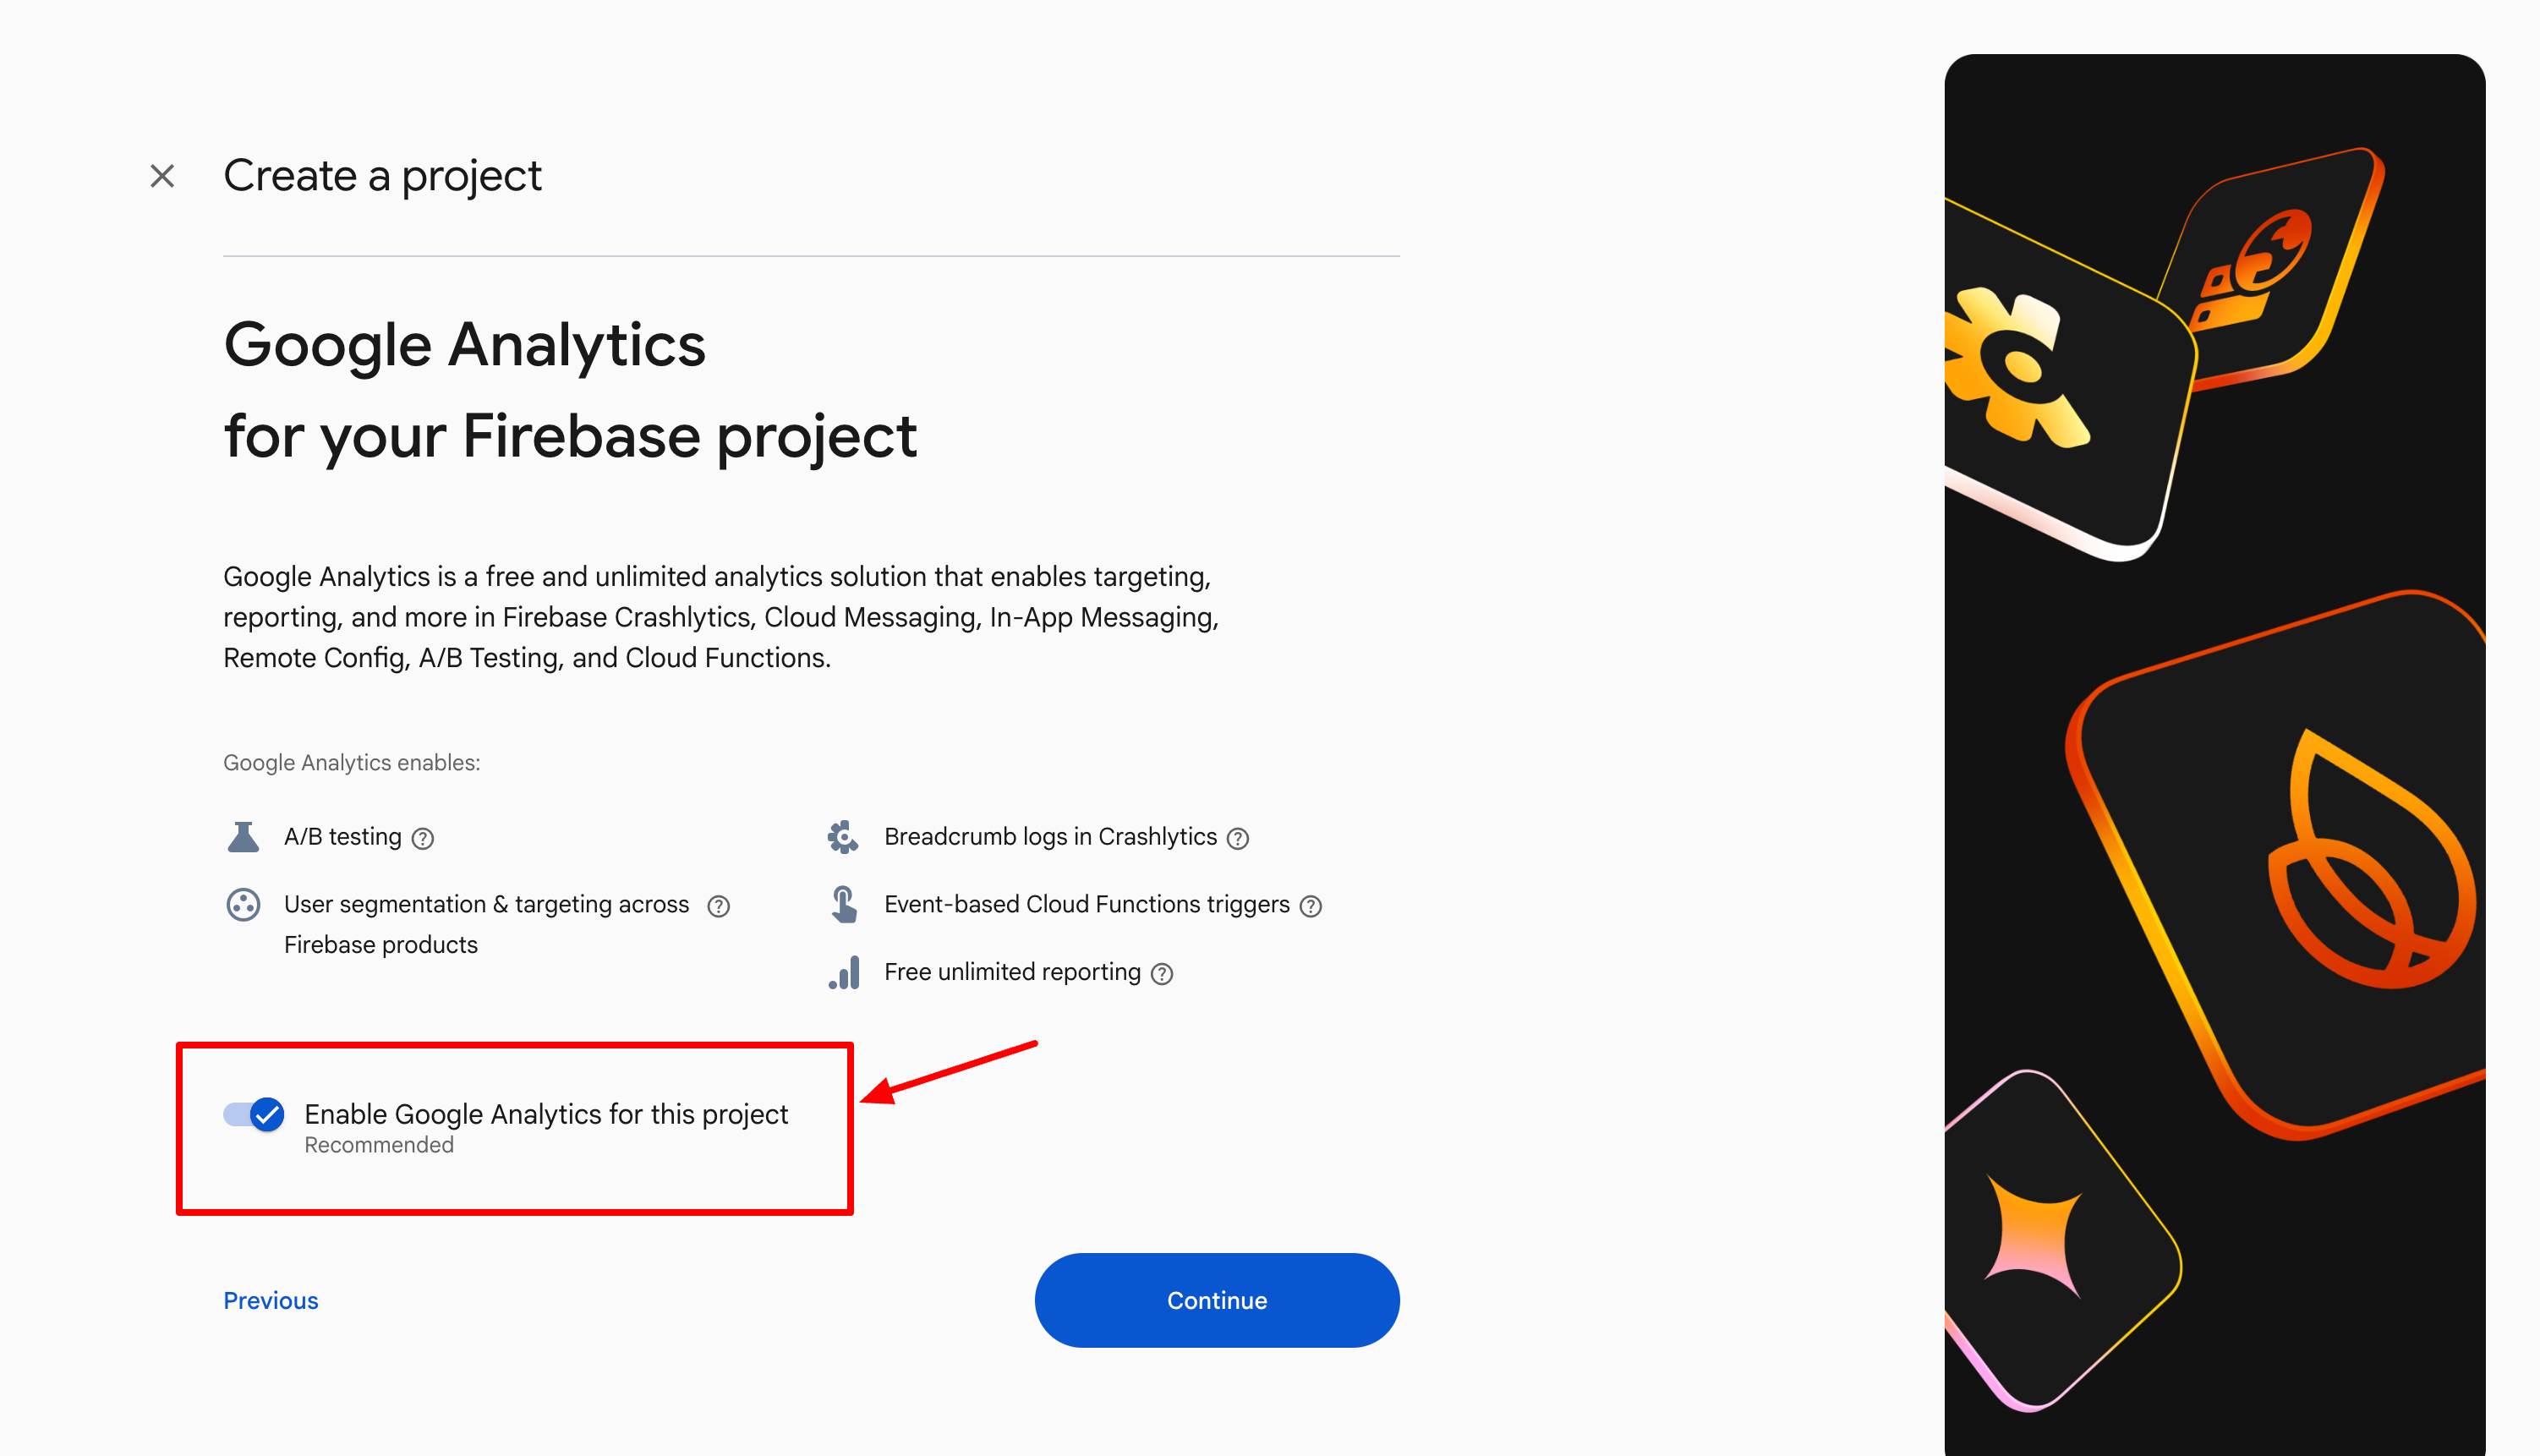
[Screenshot: Google Analytics toggle screen]
Step 5: Upgrade to the Blaze Plan
Once your project is ready, you will see your project dashboard. Now we need to upgrade your plan.
On the left side menu, near the bottom, you will see "Spark" (the free plan). Click the "Upgrade" button next to it.
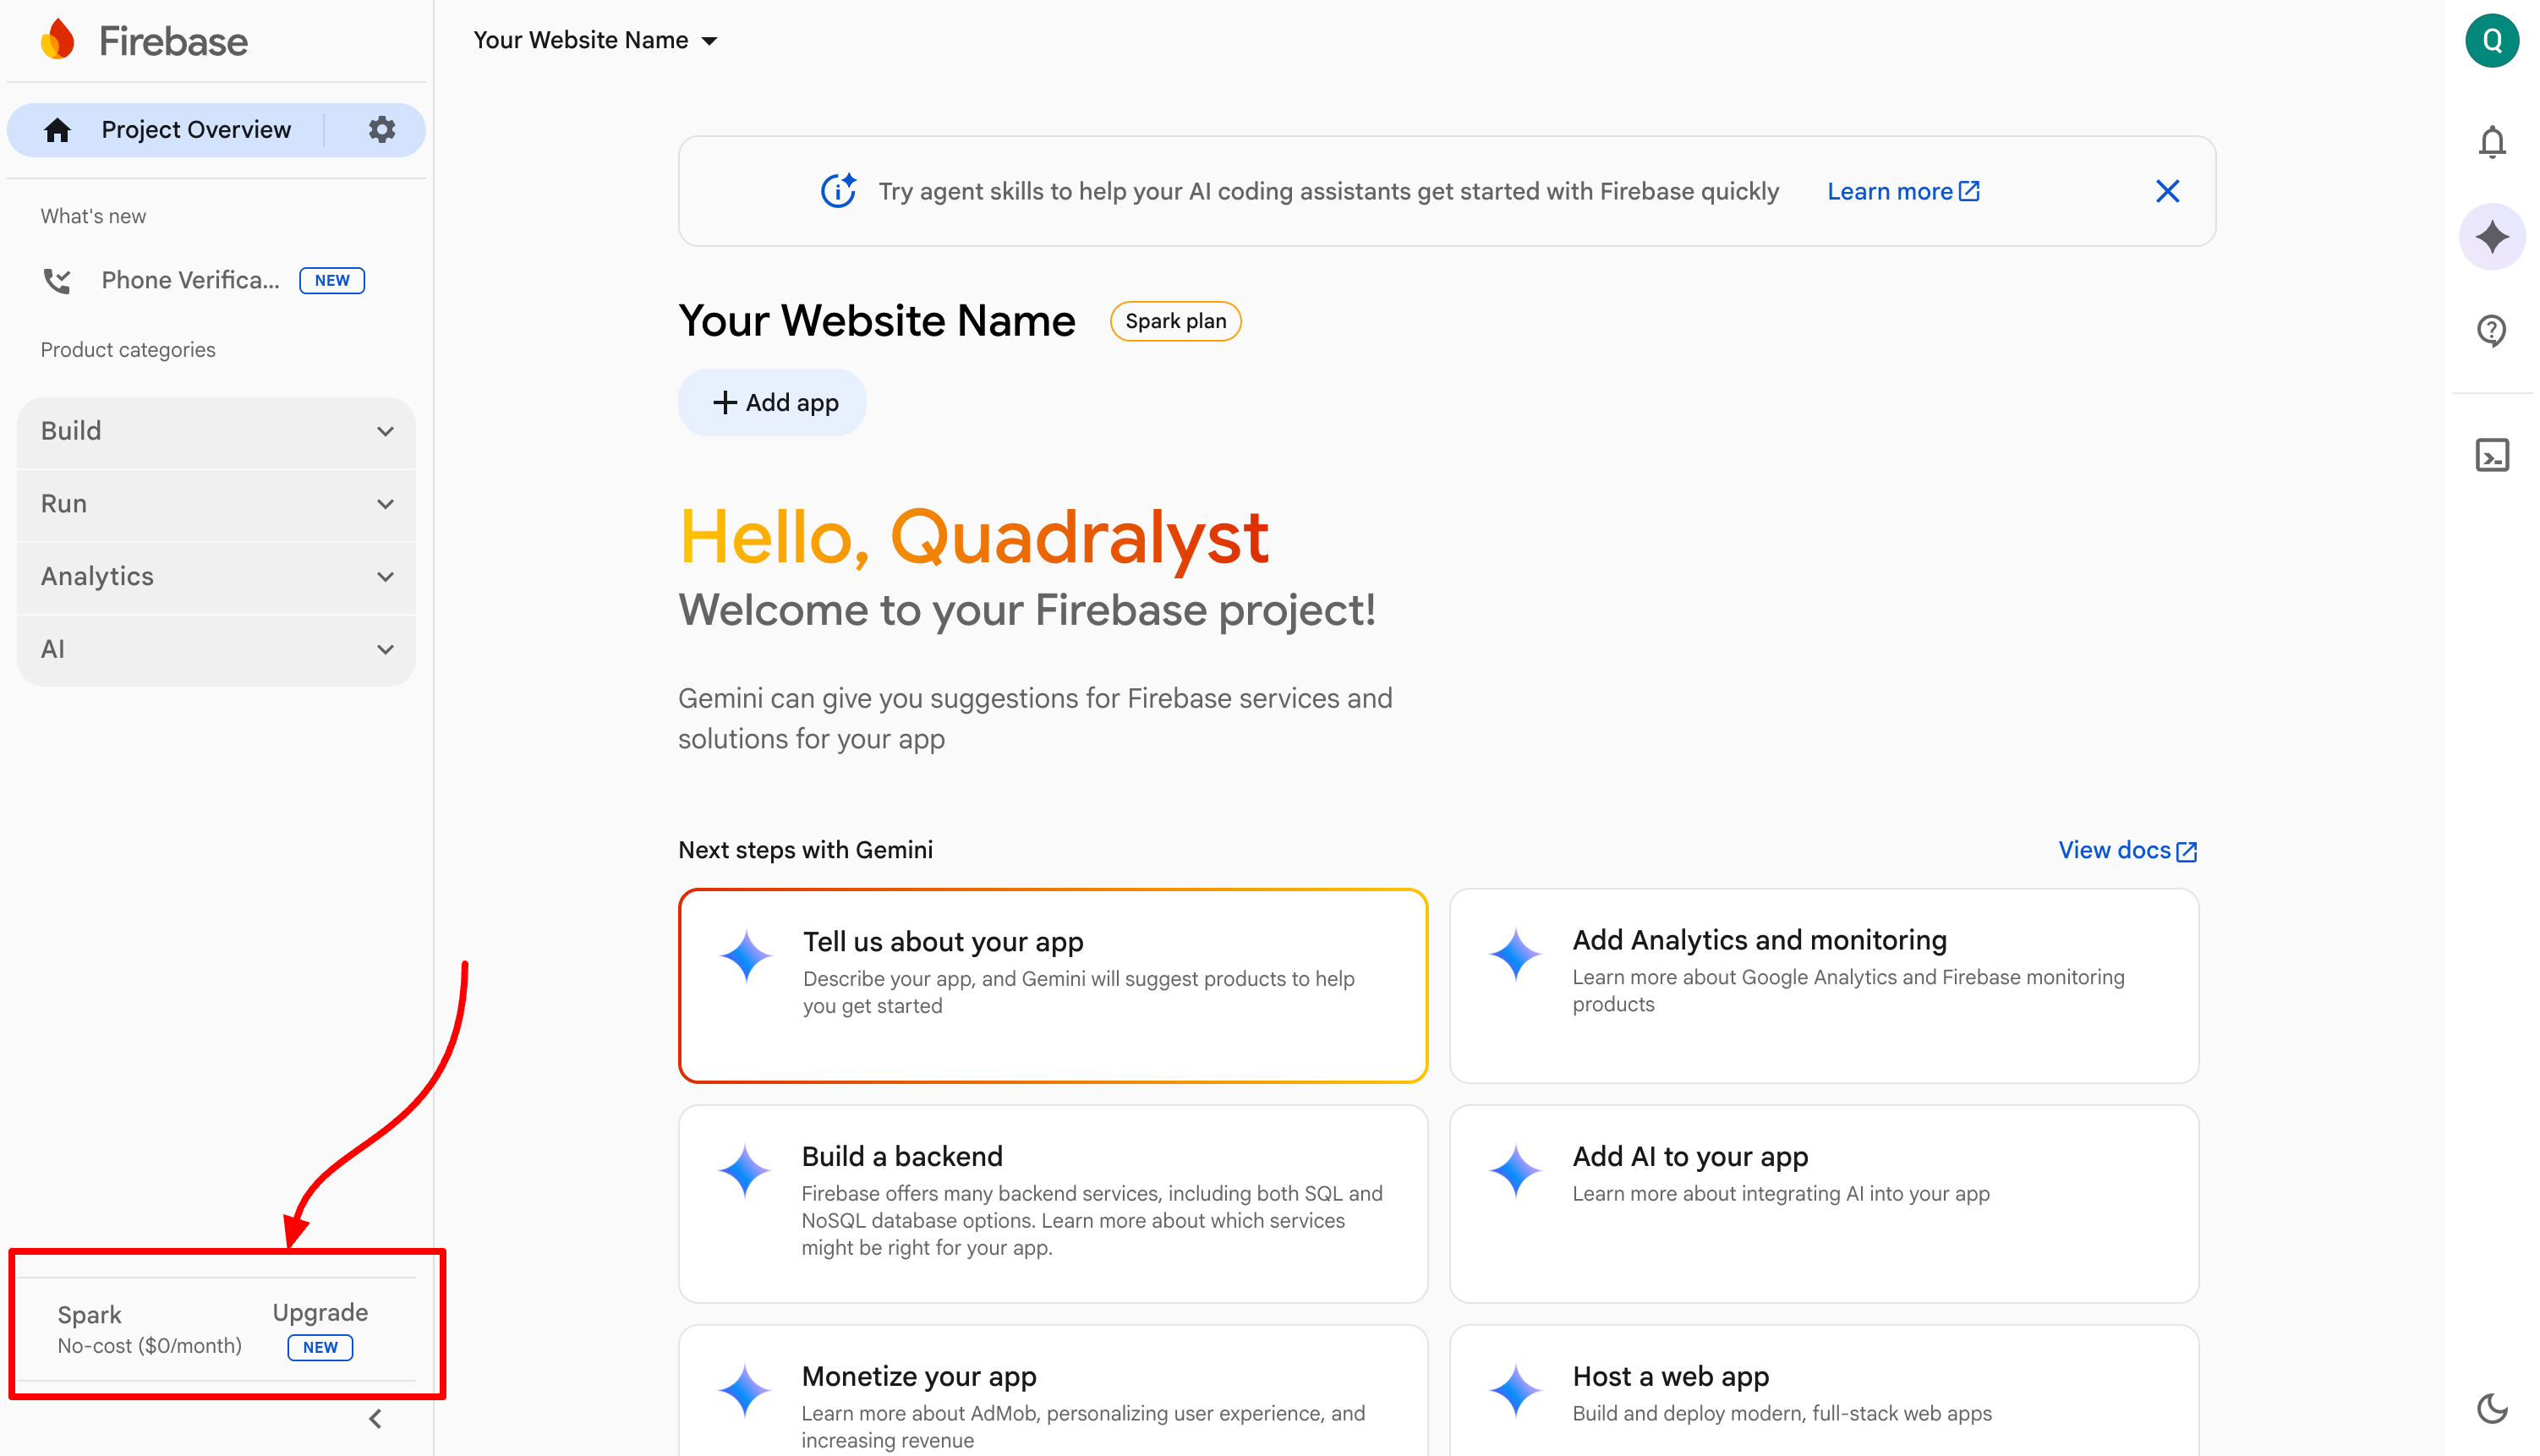
[Screenshot: Spark plan with Upgrade button highlighted]
Why is the Blaze plan needed?
Arc CMS uses Firebase Cloud Functions to handle things like sending emails, processing waitlist signups, and tracking referrals. Firebase only allows Cloud Functions on the Blaze plan.
Will I be charged? The Blaze plan is pay-as-you-go, but it includes the same free limits as the Spark plan. For a typical pre-launch landing page, your usage will stay well within the free tier. Most Arc CMS users pay nothing at all.
Think of it like a prepaid phone plan where the first generous chunk of usage is free every month. You only pay if you go beyond that, and for a landing page with a waitlist, that is very unlikely to happen.
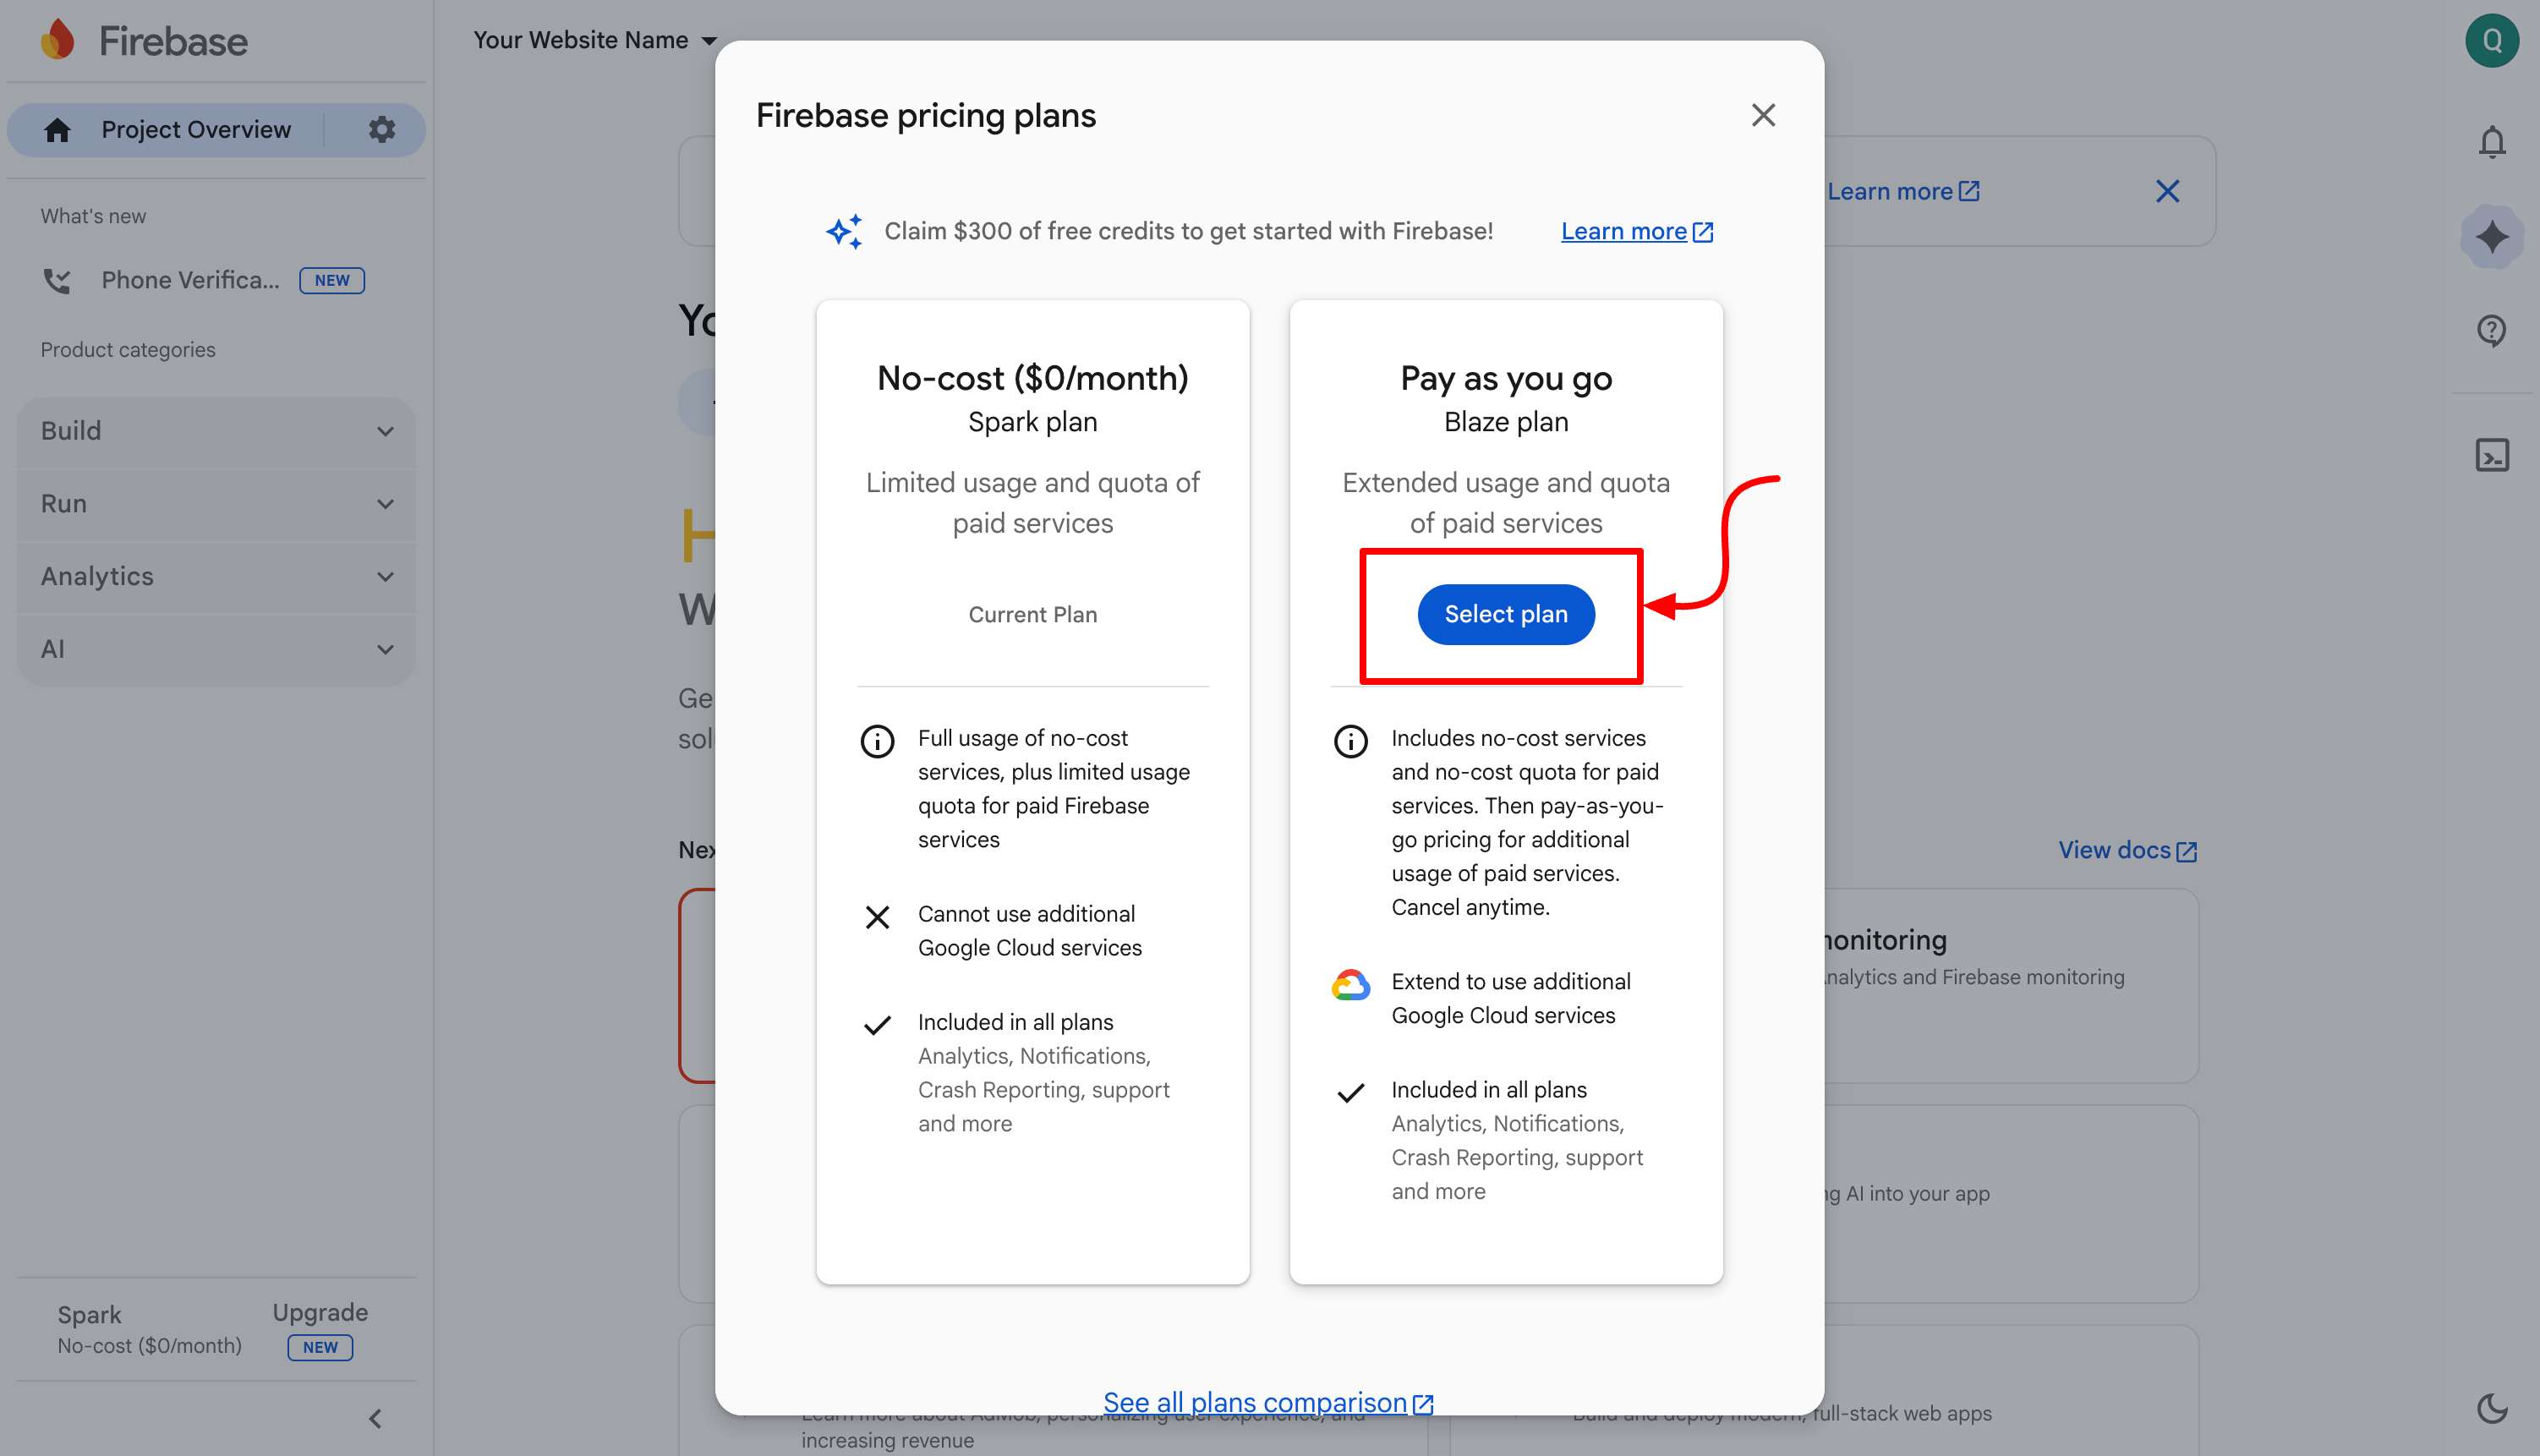
Step 6: Select the Blaze Plan
You will see a screen comparing the Spark and Blaze plans.
Click "Select plan" under the Blaze column
Firebase will ask you to link a billing account
If you don't have a billing account: Google will walk you through creating one. You will need to enter your country and a payment method (credit or debit card).
If you already have one: Select it from the list and continue.
Click "Set up billing" or "Purchase" to confirm.
[Screenshot: Plan comparison screen with Blaze highlighted]
Step 7: Set Up a Budget Alert (Recommended)
This step is optional but highly recommended. A budget alert sends you an email if your costs ever go above an amount you set. This way, you are always in control.
Go to Google Cloud Billing: https://console.cloud.google.com/billing
From the left menu, select "Budgets & alerts"
Click "Create Budget"
Give it a name (e.g., "Arc CMS Budget")
Under "Amount", choose "Specified amount" and enter $5
Under "Actions", set it to email you at 50% and 90%
Click "Finish"
Now you will get an email alert long before any real charges occur. For most landing pages, you will never receive this alert.
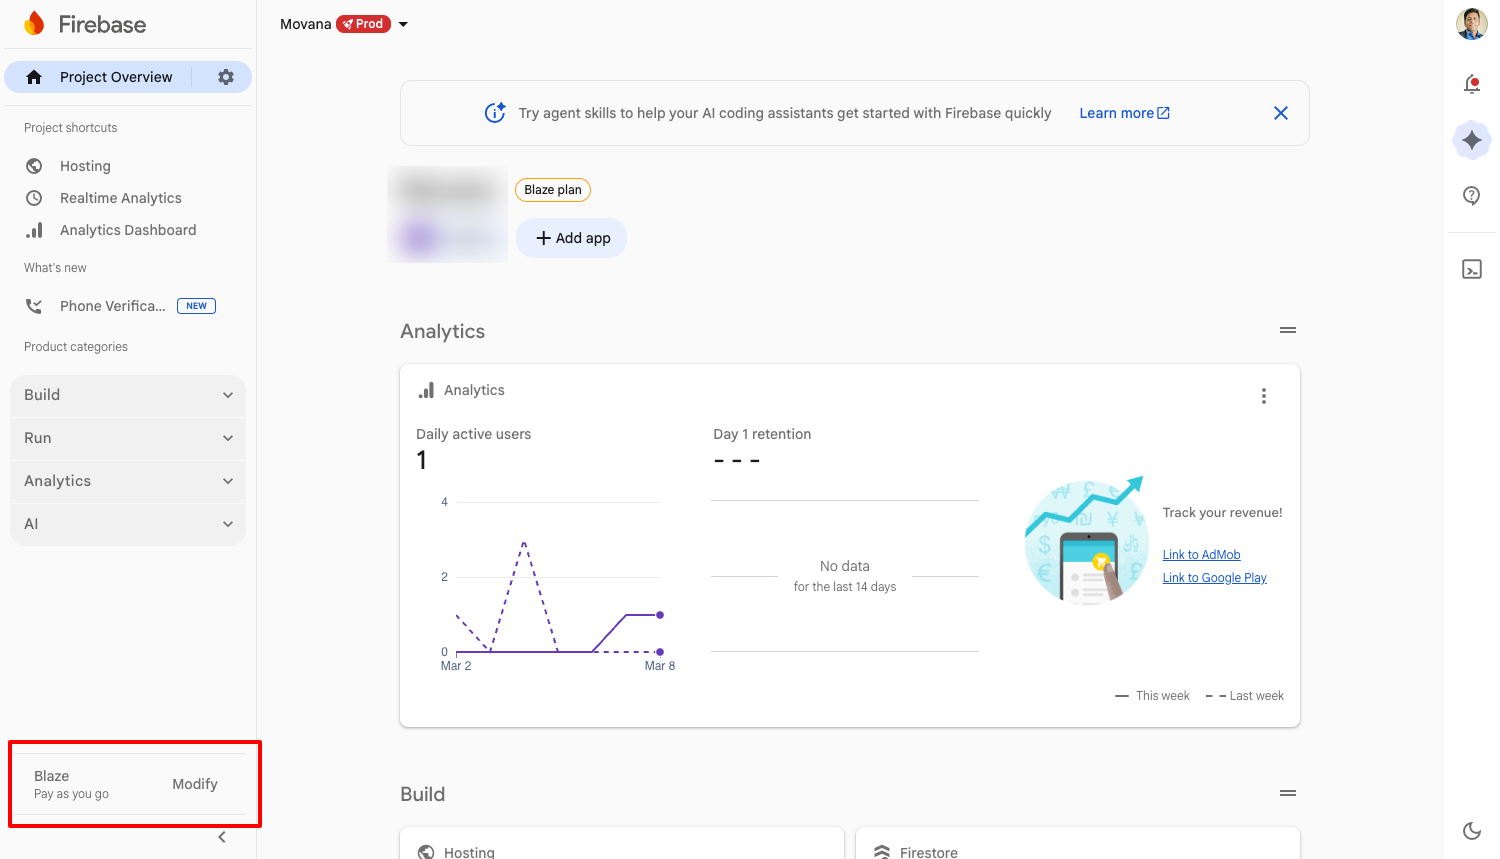
Step 8: Verify the Upgrade
Go back to the Firebase Console. You should now see "Blaze - Pay as you go" in the bottom left corner of your project dashboard.
[Screenshot: Dashboard showing Blaze plan]
Step 9: Invite Us to Your Project
This is the final step. You need to add us as a team member so we can configure and deploy Arc CMS on your server.
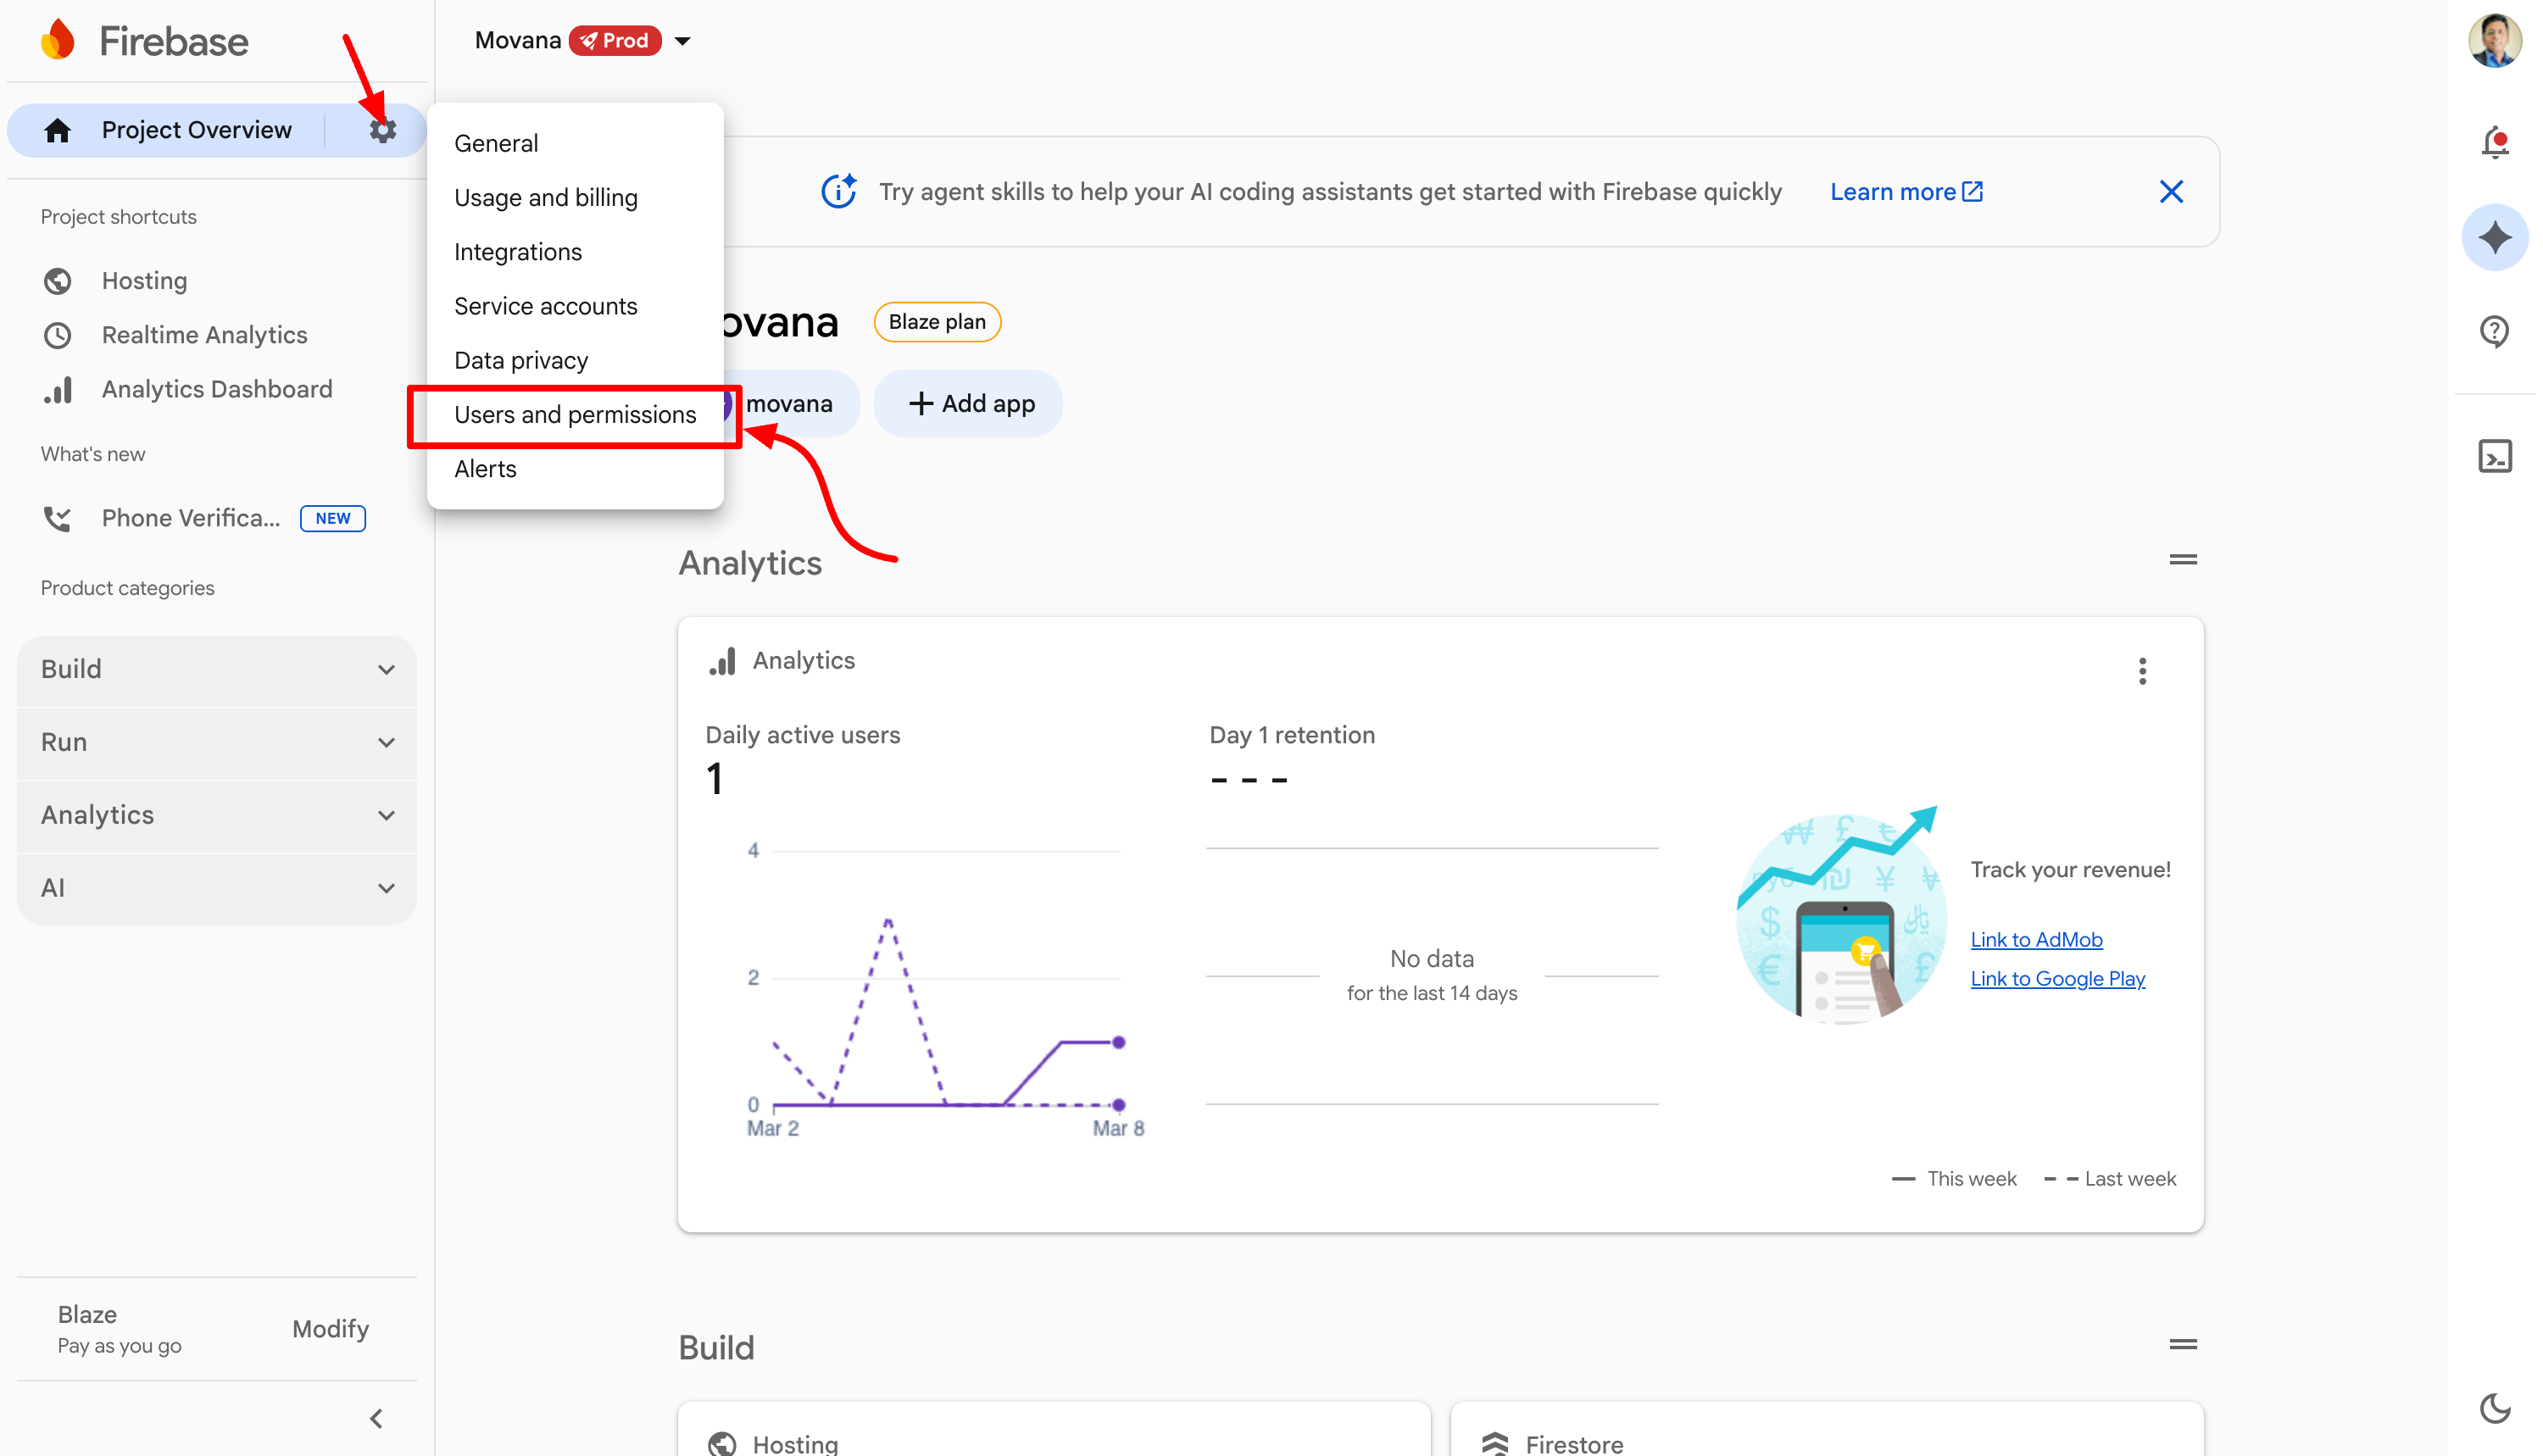
In the Firebase Console, click the gear icon next to "Project Overview"
Select "Users and permissions"
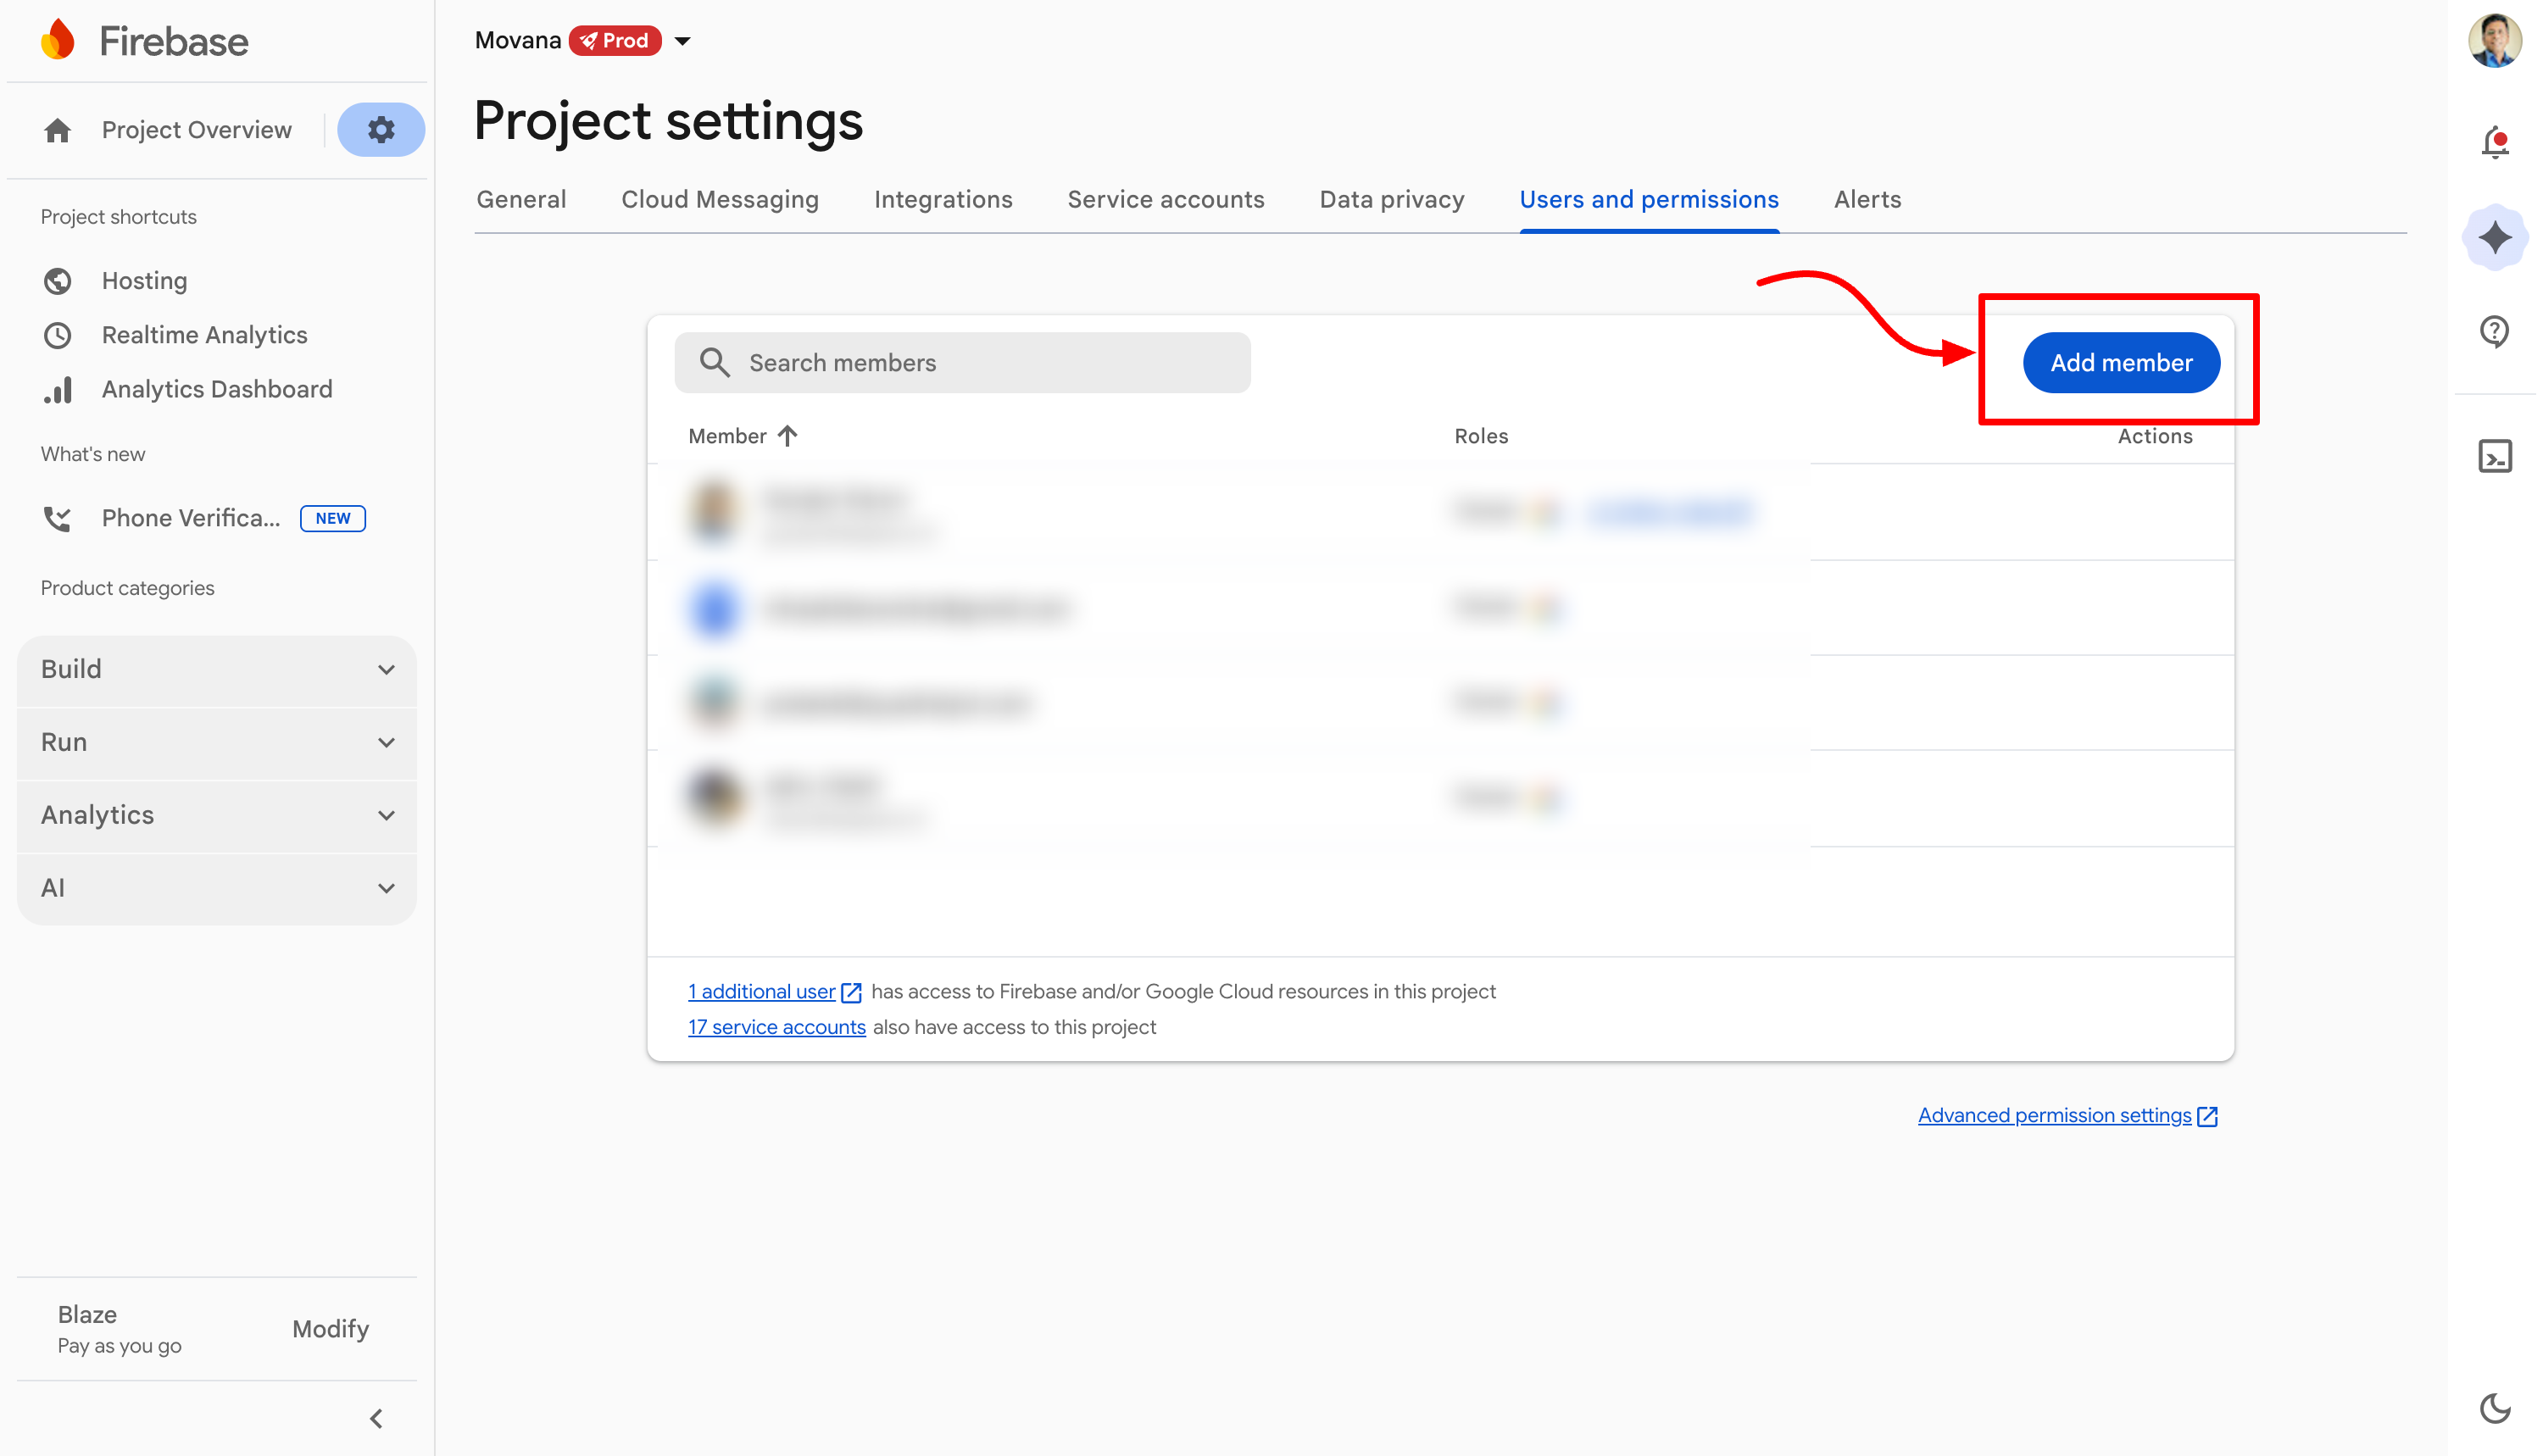
Click "Add member"
Enter this email: hi@quadralyst.com
Set the role to Owner
Click "Add member"
[Screenshot: Users and permissions menu in project settings]
[Screenshot: Users and permissions screen with Add member highlighted]
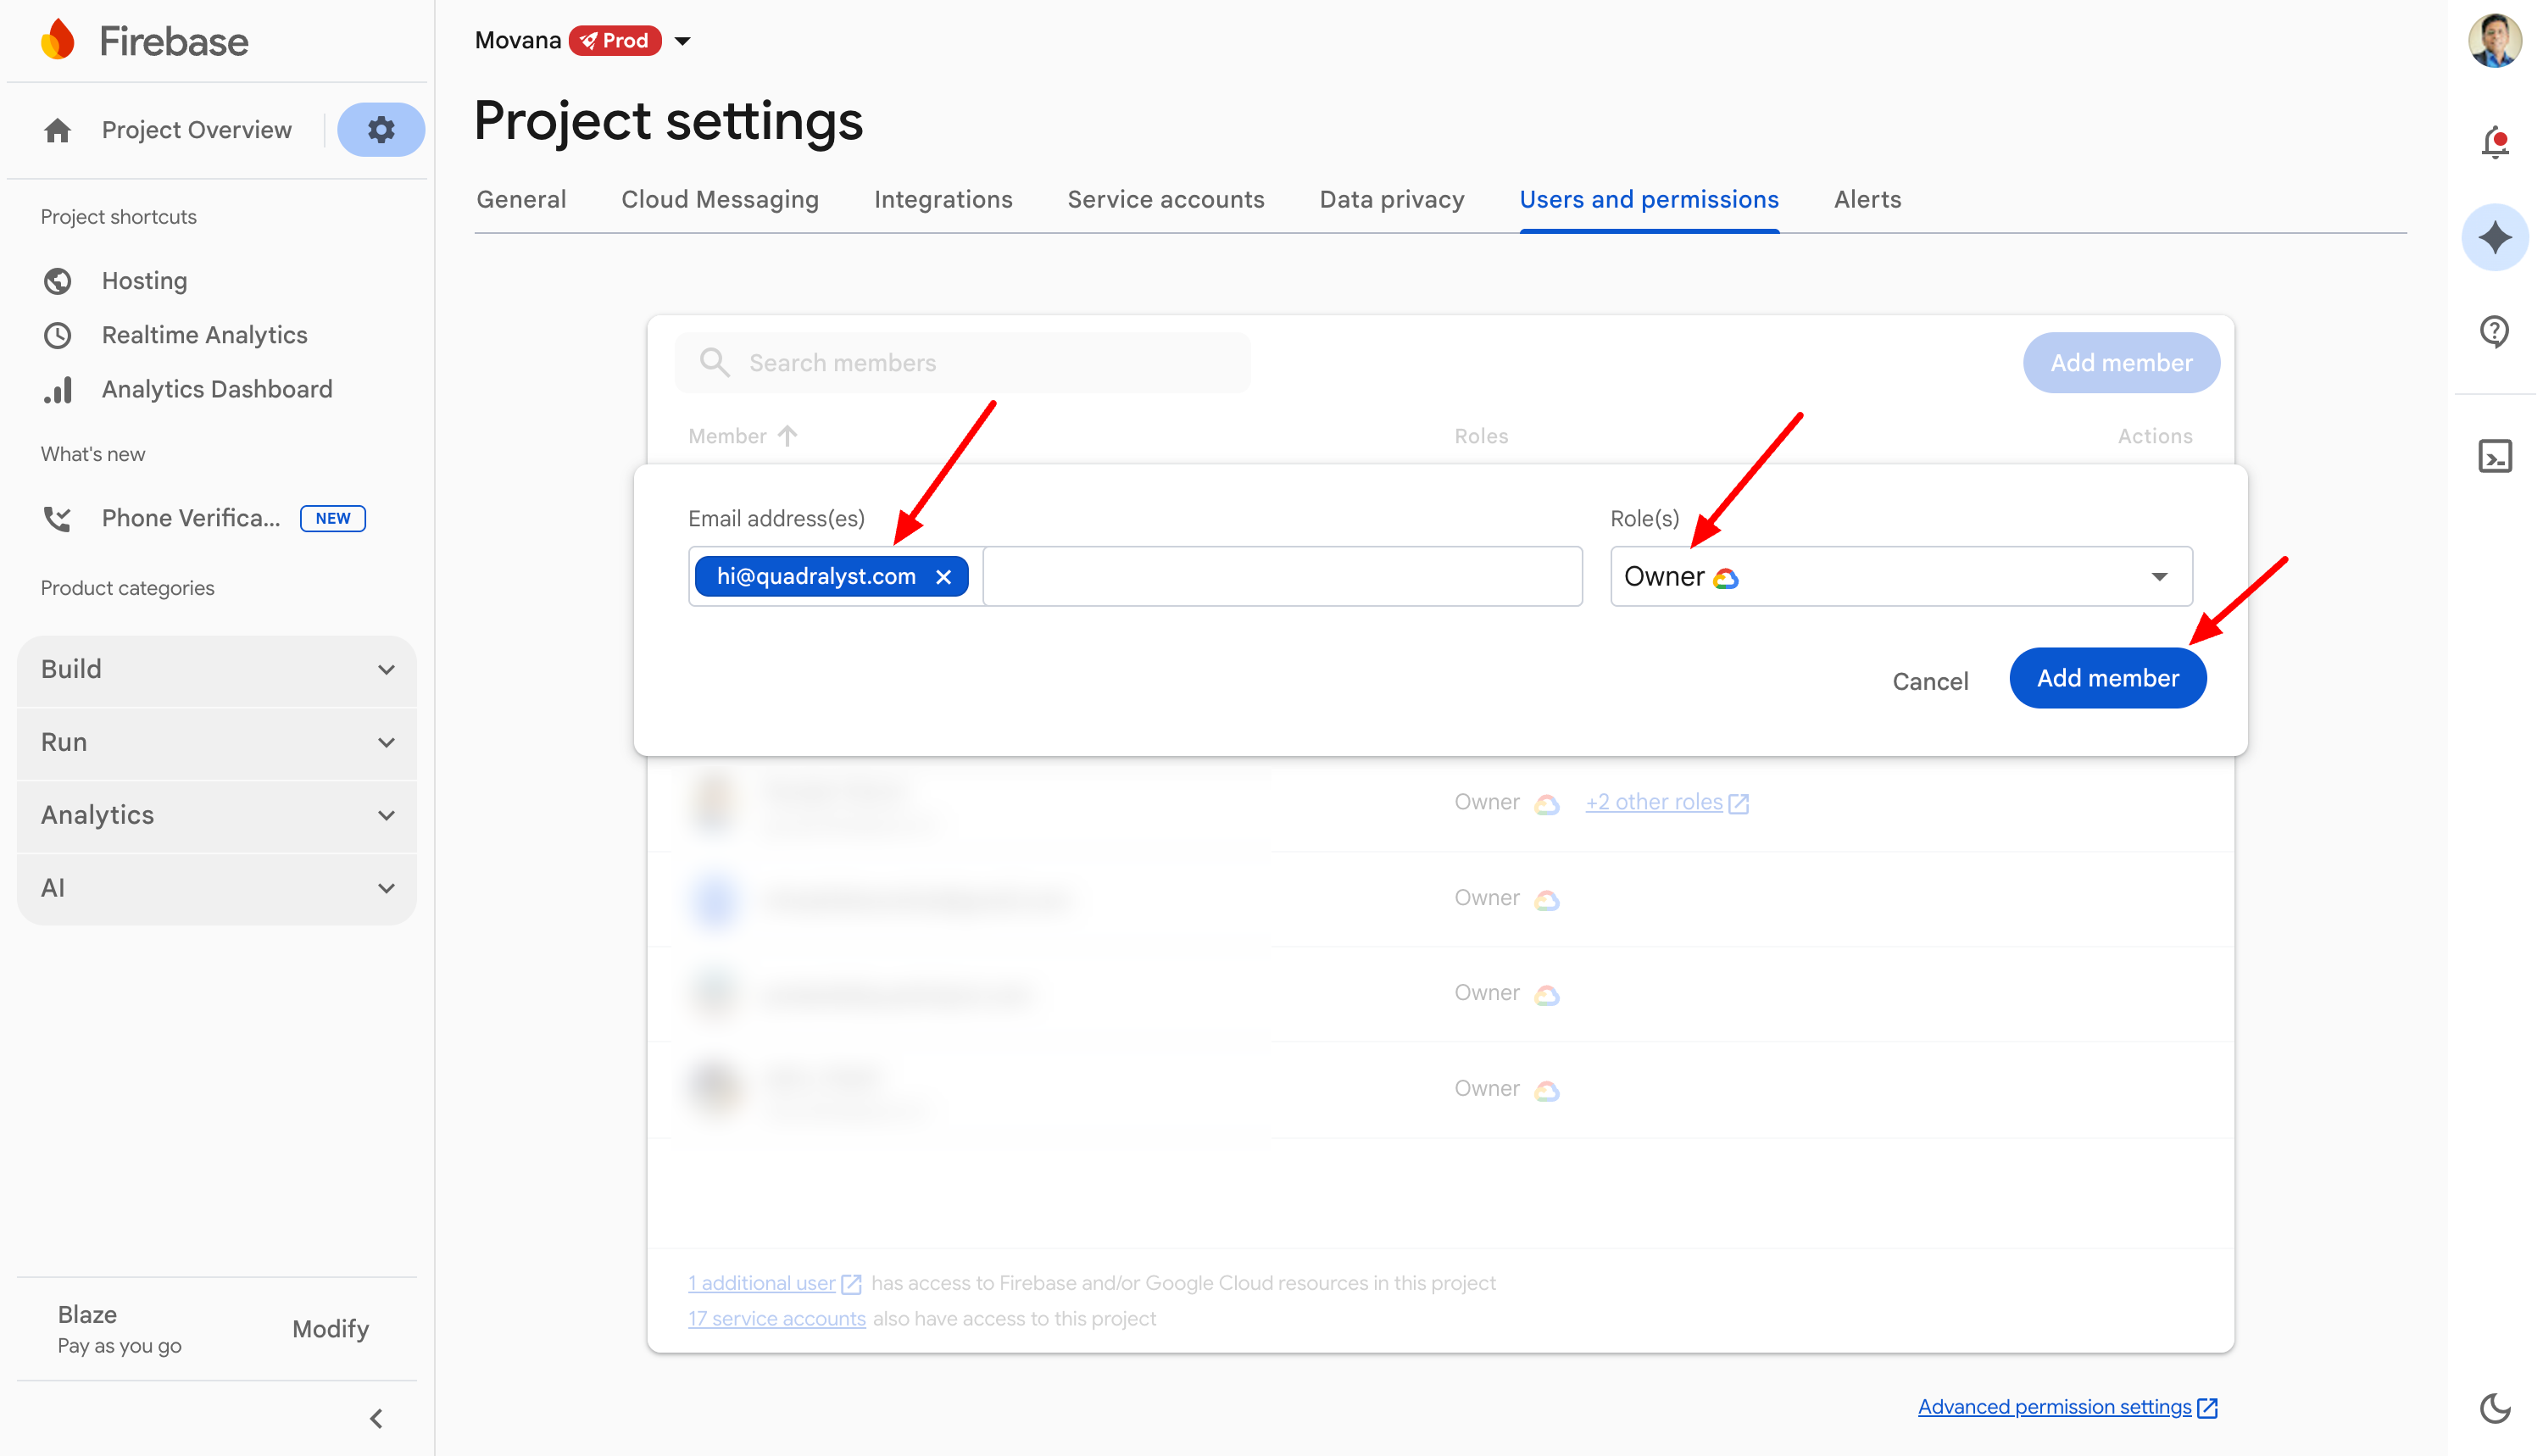
[Screenshot: Add member dialog with email and Owner role]
Why Owner access?
To set up Arc CMS, we need to configure multiple Firebase services on your behalf: Hosting, Cloud Functions, Firestore (database), and Storage. The Owner role is the only role that allows us to enable and configure all of these services in one go.
Once the setup is complete, you are free to change our role to "Editor" or remove our access entirely. You are always in control of your project.
What Happens Next?
Once you have completed these steps, reply to our email and let us know. We will:
Configure Arc CMS on your Firebase project
Deploy your landing page with all the Arc CMS features
Send you a link to your live site and your admin dashboard
The setup usually takes 1-2 business days after we get access.
Need Help?
If you get stuck on any step, just reply to our email. We are happy to hop on a quick call or screen share to walk you through it.